Beta75XもBeta65Xも快適に飛行出来て気に入っていますが、いろいろと問題もありました。
[ Prop Washout ] Beta75X Washout Tuning を施すことでだいぶ良くなります。根本的にはプロペラを囲んでいるダクトが良くないという話しもあり、ダクトを削るという手法もあるそうです。これはまだ試していません。
65Xも似たような挙動がありますが、今のところ何もいじってはいません。
[ 75Xでモーターが止まる]
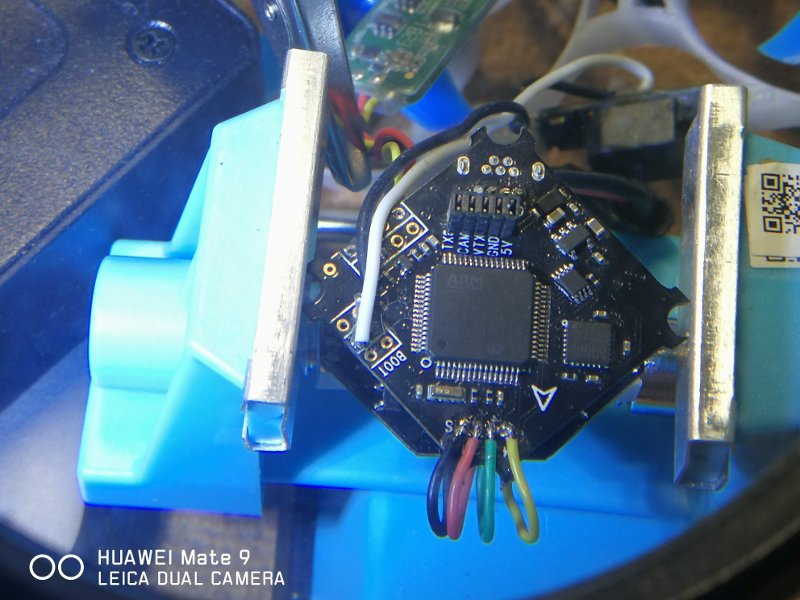
[ 65XのFCボードのピンが半田付け不良 ]
[ 65XのSBUSポートが動かない ]
[ 65Xのプロペラが外れる ] (追記)
今のところ、こんな感じです。
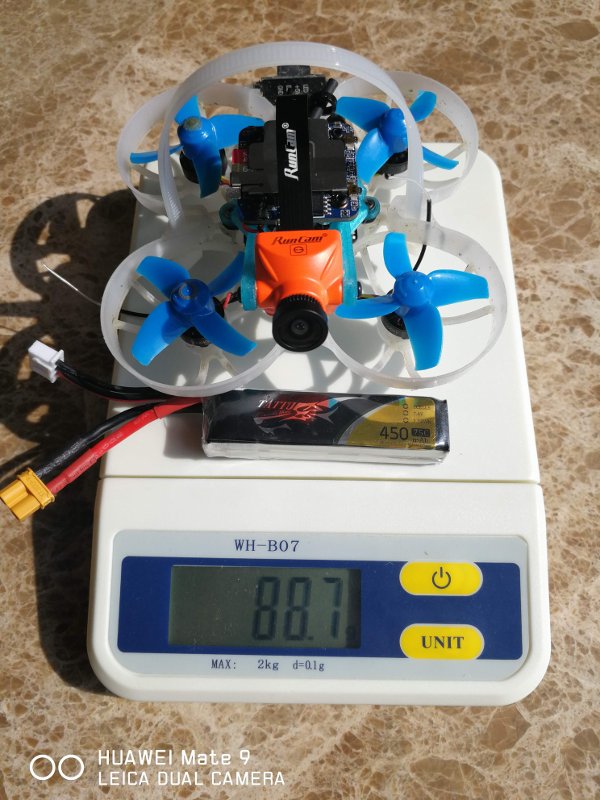
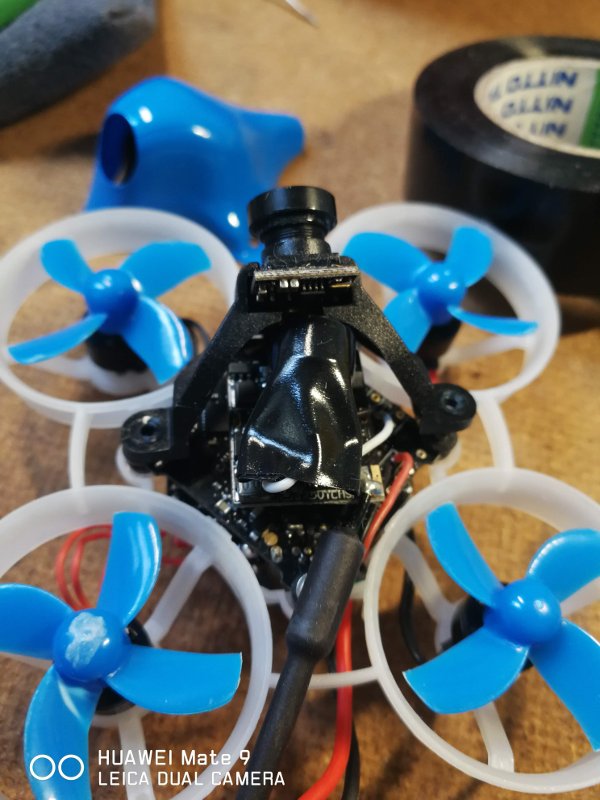
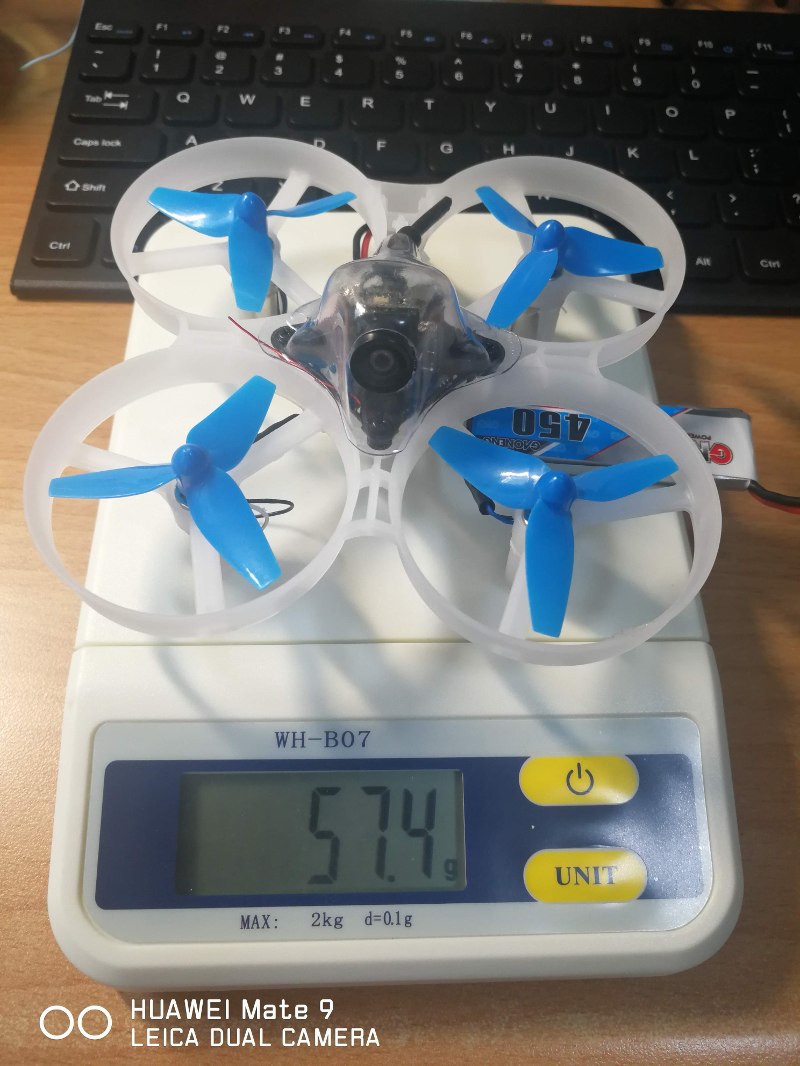
BetaFPV Beta75X 2Sはとても力強くポテンシャルの高いブラシレスなマイクロドローンです。これにRunCam Split Mini 2を搭載してHD画質(1080P 60FPS)での録画が出来るようにしました。
マウントは3Dプリントしたもので上海のFPVドローン師匠の設計です。写真のものはバージョン1で、ただいま進化中です。
カメラもボードもむき出しです。そのためクラッシュでボード上のスイッチがもげてしまいました。この部分は改良の余地ありです。
重量は17gほど増えて450mAhのバッテリーを使用した場合の総重量は88.7gになりました。またRunCam Split Mini 2の消費電力が650mAx5Vもあるのが少し心配です。
実際に飛ばしてみると、オリジナルに比べると重さを感じます。それでもロールくらいは軽くこなせるほどにパワーの余裕はあります。飛行時間は450mAhのバッテリーではオリジナルに比べると2分ほど飛行時間が短くなり、2分半を経過したら何時でも降ろせる状態にしなければなりません。マイクロドローンとしては標準的な飛行時間とも言えます。
VIDEO
PS. ひとつ書き忘れ。Beta65XでもRunCam Split mini2を試してみましたが、今一つでした。飛ぶことは出来ますが燃費が悪すぎます。飛行時間が1分あるかないかくらいになってしまいます。実用的とは言い難いです。
Beta75Xに続いてBetaFPV Bet65Xも飛ばし始めました。こちらも2Sバッテリーで力強い飛び方をします。わずか10mm(モーターの対角線上の距離)ですが小さいと室内でも無理なく飛ばせます。ただ、そのパワー、速度を実感するためには屋外飛行を行わねばなりません。
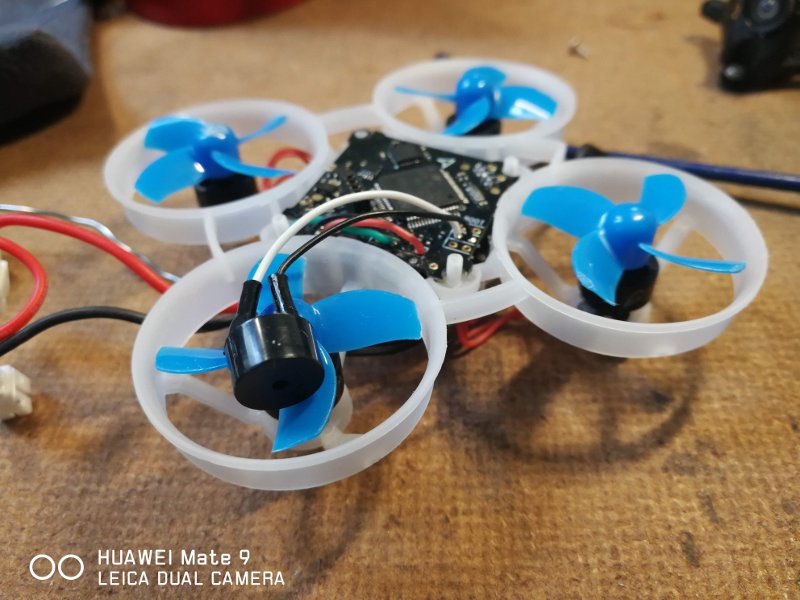
何と言っても小さな機体です、ブッシュに埋まると探すのが大変ですので、まずはブザーを取り付けました。
75Xはフレームにブザーを取り付けるところがありましたが65Xにはありません。単体のブザーは小さいので、そのままキャノピーに押し込む事にしました。
これで屋外飛行の準備は完了です。
65XのPIDなどは全く弄らずに飛ばしてみました。激しい動きをすると、変な動きがあるようにも思えます。チューンした75Xに比べるとアクロバティックな飛行は難しい気もします。これは私が慣れていないからかも知れません。
普通にビュンビュンと飛ばすだけならば、かなり面白いです。
VIDEO
Beta75Xの電源ケーブルは二つの仕様があります。私が購入したのは1Sバッテリーを二つ使用するタイプのものでした。最初に付いていたものはケーブルも太くしっかりとしたものでしたが、いろいろと改造しているうちに手違いでショートさせてしまいコネクターを焼いてしまいました。
手持ちのPH2.0コネクターを取り付けましたが、これのクオリティが今一つで衝撃で緩んだり、挙句の果てにはピンのカシメが緩くなり電線が抜けてしまいました。質の良いPH2.0コネクターを探そうとも思いましたが信頼性を考えてXT30に交換することにしました。電流の流れを良くするためにBeta65XをXT30使用に変更した人もいるくらいなので、瞬発力も良くなるかもしれません。
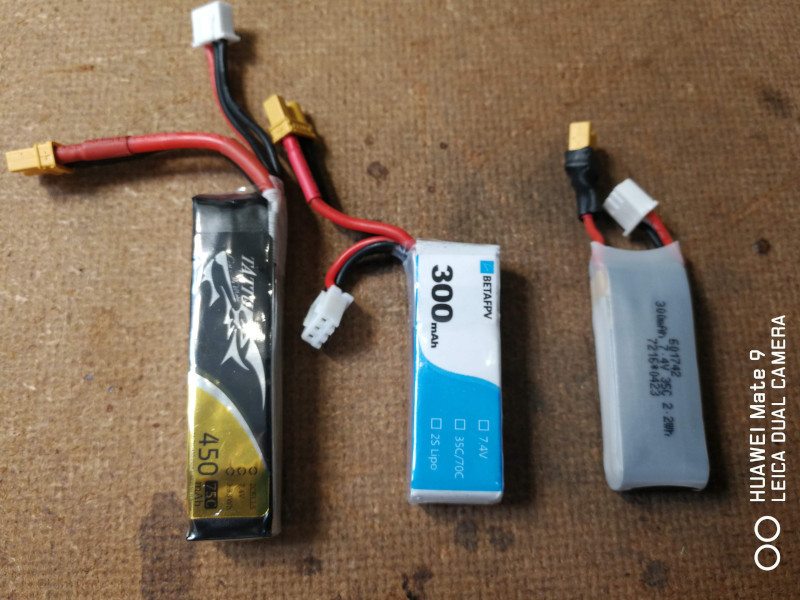
[ 電池 ]
BetaFPV純正
59元
7.4V 300mAh 35C/70C
18.1g
2個セット118元で売っていた
XP03002ECO
28.8元
7.4V 300mAh 35C
16.1g
Babyhawk用として売っていた
TATTU
43元
7.4V 450mAh 75C
28.4g
大容量ながら、そのまま75Xの電池ホルダーに入る
XP03002ECOは格安ですがコネクターが違うのでXT30に交換する手間がかかります。そのうえ、実際に飛ばしてみると電圧低下が速くLow Battery alarm(セルあたり3.5V)が数十秒で鳴り始めます。その後、2分以上飛ばせますが今一つ気持ちが悪いので限界まで飛ばすこともなく使用するのをやめました。
TATTUは大容量なので当然重量も10gほど増加します。気持ち飛び方が重くなりますがロールもフリップも普通にこなせるので第三者的に見ていればさほど飛び方は変わっていないのかもしれません
飛行時間は純正電池(300mAh)だと2分半ほどでLow Batteryが出て3分半でLand Nowが出ます。その後もしばらくは飛ぶので場合によっては4分くらい浮いています。 TATTU(450mAh)は4分半でLow Batteryが出て5分過ぎにLand Now、頑張って5分半浮いているくらいの感じでした。TATTUは期待通り長時間飛ばせましたがLow Voltageが出てからの電池の減りがやや速く感じました。普通に飛ばすのは、やはり純正電池が良いようにも思えます。しかし容量が増えて値段が安いのは魅力ですのでどちらを買い足すぺきか非常に悩みます。
左からTATTU 450mAh. BetaFPV 300mAh, ノーブランドXP03002ECO 300mAh
Beta75Xの飛行は99%、屋外でFPVで行っています。そのため予定外の場所に着地した場合、機体が小さいので草むらなどでは目視で発見することは困難です。Beta75Xではmotor beeperも使えるようにはなっていますが、流石にモーターが小さいので実用的な大きさの音を鳴らすことは出来ません。追加でブザーを取り付けるのがお勧めです。
幸いBeta75XのFC にはBuzzer padがありますし、フレーム後方にもブザーを取り付けるところがあり、幅が23mmほどの基板がちょうどはまります。
BetaFPV Beta75X 2Sは形状としてはTinywhoopですが、ブラシレスモーターを搭載しバッテリーも2S(2つのセルを直列接続したもの)で可動するパワフルなFPVドローンです。モーター間の長さは75mmと手のひらサイズですが室内で飛行するには明らかにオーバーパワーで屋外飛行に適しています。手のひらサイズですので小さな広場でも無理なく飛ばせます。ダクトでプロペラが囲まれているので、周辺に人がいても恐怖心を与えることはありません。とは言え素肌に回転するペラが当たると怪我はしませんが、かなり痛いです。したがってやはり人が多い時は飛ばさない方が良さそうです。
[ 機体の概要 ]
[ 快適な屋外飛行 ] VIDEO
注意) 日本国内では使用できないパーツや使用するにあたって無線免許などが必要なパーツの情報が含まれている可能性がありますので予めお断りしておきます。
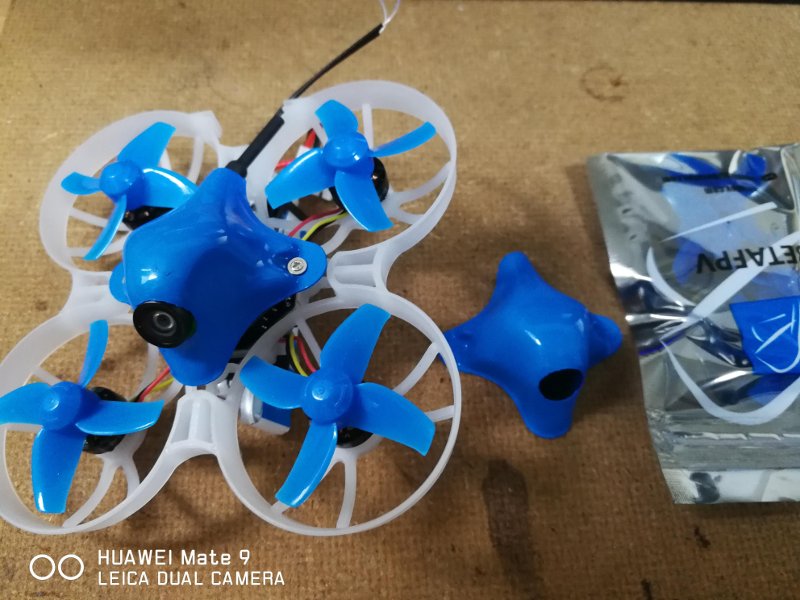
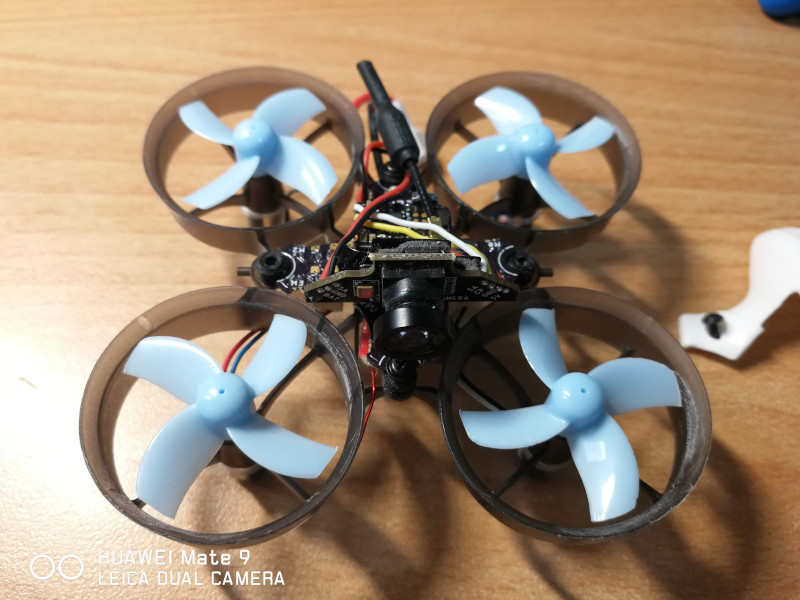
今月作った二機目の室内小型機はAlienWhoop ZER0 (zeroにあらず)というFCを使うことを目的としています。十字型にカットされ、如何にも軽量化の主張が強いFCですので、ここは軽量かつパワフルな機体を目指すことにしました。
[ 部品構成 ] FC : AlienWhoop ZER0 Brushed Flight Controller Camera + VTX : TBS UNIFY NANO + TINYCAM COMBO Frame : COCKROACH SUPER-DURABLE FRAME Prop : TBS X TINYWHOOP BRUSHED RACE PROPS Motors : TBS MICRO BRUSHED MOTORS (0617 / 21000KV) Battery : 300mAh 1S 30C HV Battery Receiver : Griffon fpv 8ch frsky micro receiver v1.0 Canopy : Tiny7の物をカットして使用
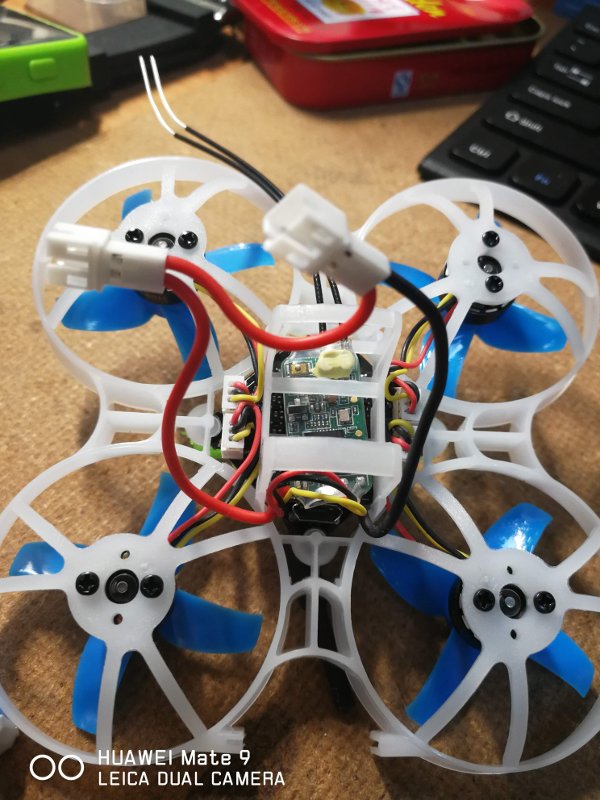
受信機は下側に貼り付けた
ZER0を受け取って最初に気づいたのがUSBコネクターが無いことでした(<-スペックとか読まずに買ったやつです)。カスタムファームウェアをフラッシュする場合は別として、基本的にはFC側では設定することは何もありません。そのためFC側の期待するチャネル設定を送信機側で行う必要があります。詳しくは説明を読んでもらうしかありません。説明書によるとCH5がArm/Disarm, CH6がlevel modeになっていて、CH7, CH8はオプショナルと書かれています。しかし、私の場合CH8まできっちり設定しないとLevel modeにすることが出来ませんでした。
Camera+VTXを載せたところ
CameraとVTXは両面テープで貼り付けられて一体化されています。Smart Audioの機能もありますが、この構成では使いません。FCへの取り付けも付属の両面テープで貼り付けるだけです。
カメラの位置が低いのでBetaFPVのキャノピーは使えません。最初、キャノピー無しで飛ばしてみましたが、フレームの柔軟性が高いのでクラッシュすると、どうしてもFCがネジから外れてしまいます。それを防止するためと、VTX部分の保護、VTXアンテナの固定のためにTiny7用のキャノピーの前部をカットして載せてみました。
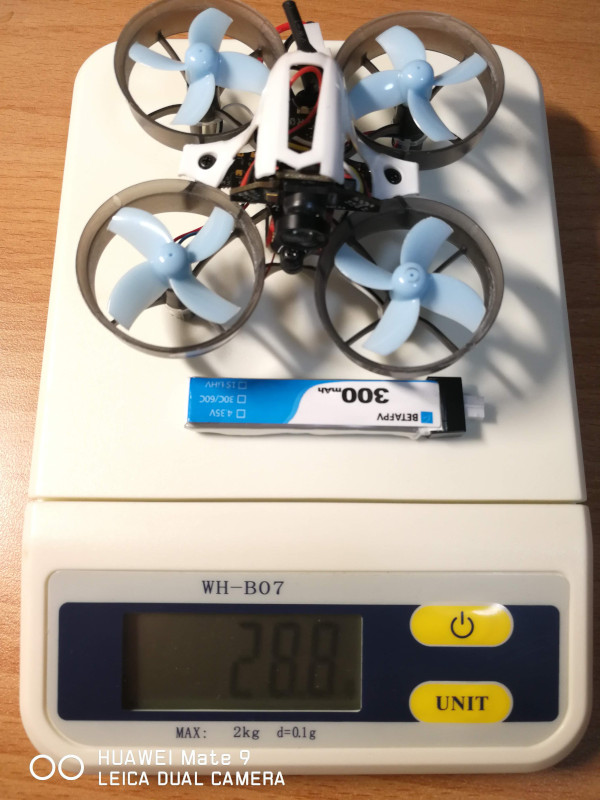
総重量は28.8gでした。我が家の最軽量であるInduxtrix FPVより、1g強重くなりました。モーターも電池も大きいので、これは致し方なし。
飛びっぷりは、すこぶる軽快です。電池が満タンの時は、ややスロットル操作が難しい気もしますが、安定しています。小さいので部屋の中でぐるぐる旋回出来ます。Race modeというのも面白いです。エルロンはlevel modeのように自動復帰しますがエレベーターはAcro modeと同じになります。これでしばらく練習してみようて思います。
注意)
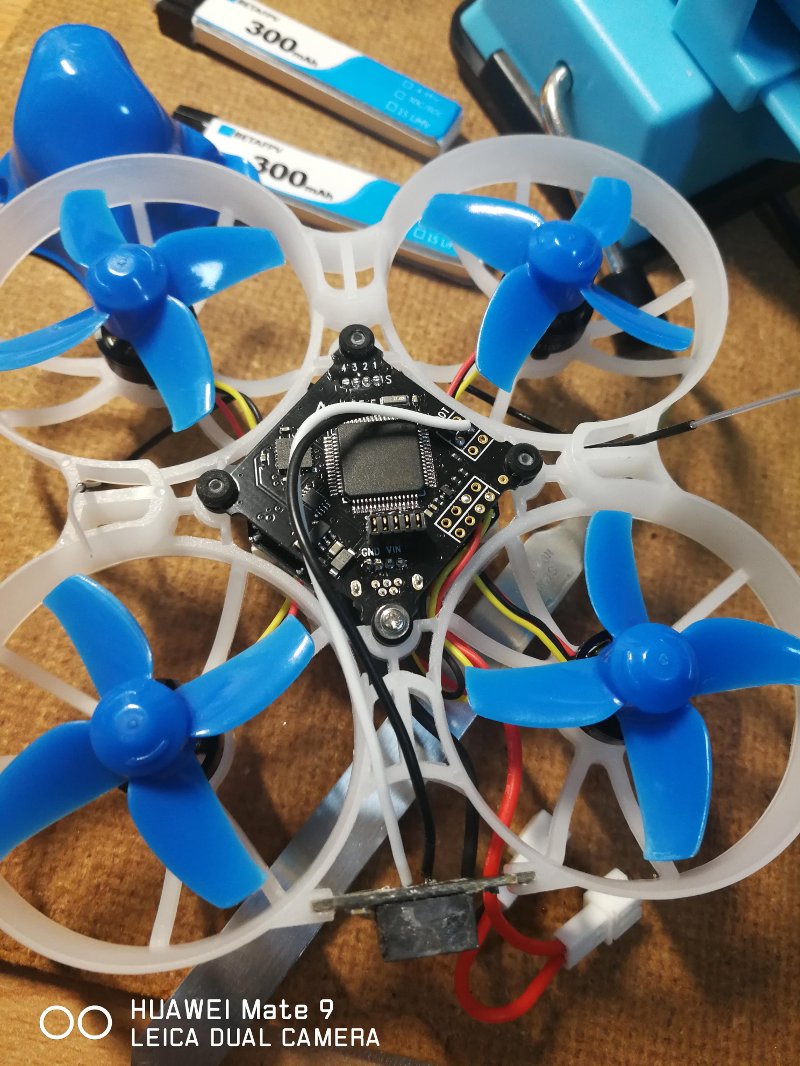
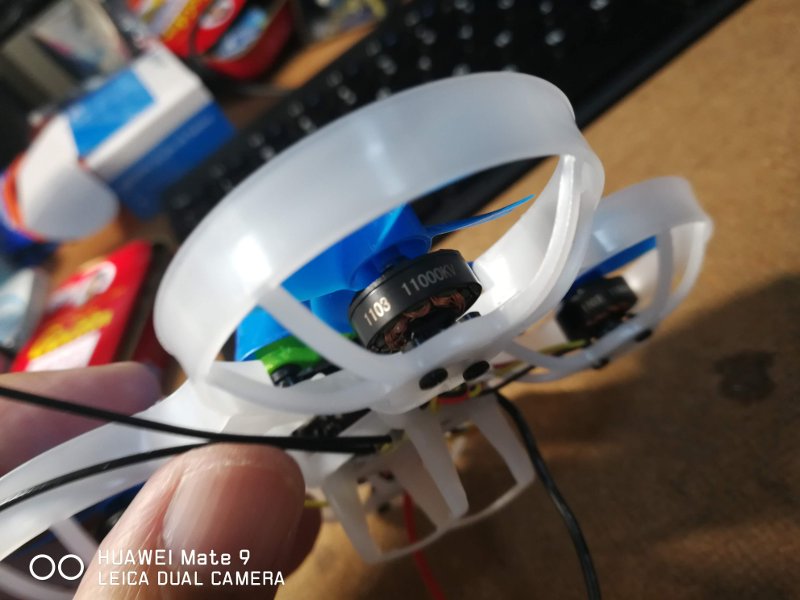
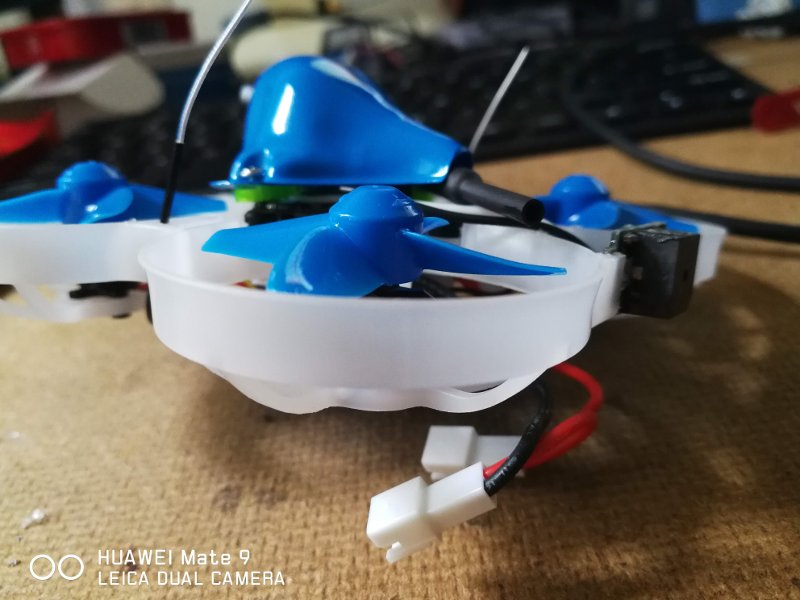
ちょっと気になるパーツがいくつかあってブラシモーターの小型機、Tinywhoopなスタイルの機体を2機作ることにしました。一機目はBETAFPVのパーツを中心とした構成の8520モーター搭載の室内機としてはやや大きめの機体です。
[ 部品構成 ] FC : F4 Brushed Flight Controller (Frsky Rx + OSD) Camera + VTX : Z02 AIO Camera 5.8G VTX Frame : 85mm Micro Whoop Frame for 8.5x20mm Motors Prop : 48mm 3-blade Micro Whoop Propellers Canopy : Canopy for Tiny Whoop Quads Motors : Ryze TechのトイドローンTelloから外した8520モーター、詳細は不明だが力強いBattery : 手持ちの450mAhのLipo
と、モーターと電池以外はすべてBetaFPVで統一してみました。
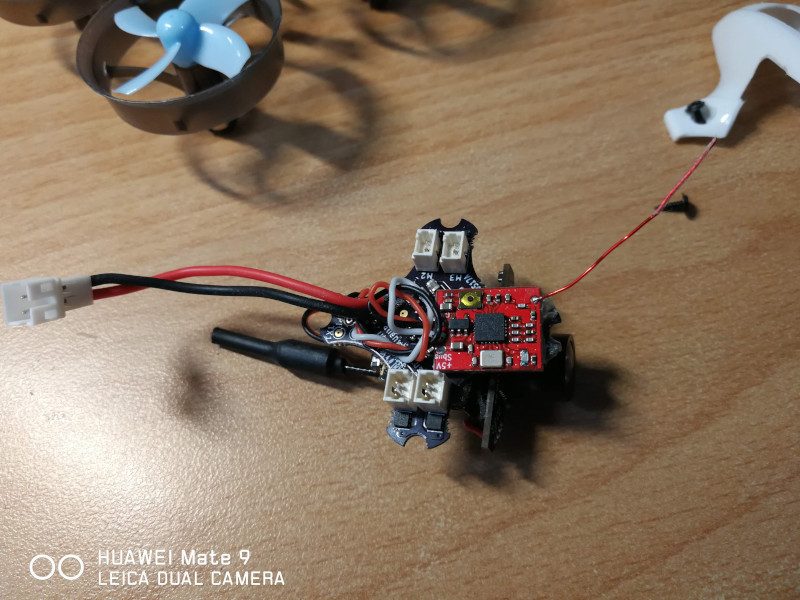
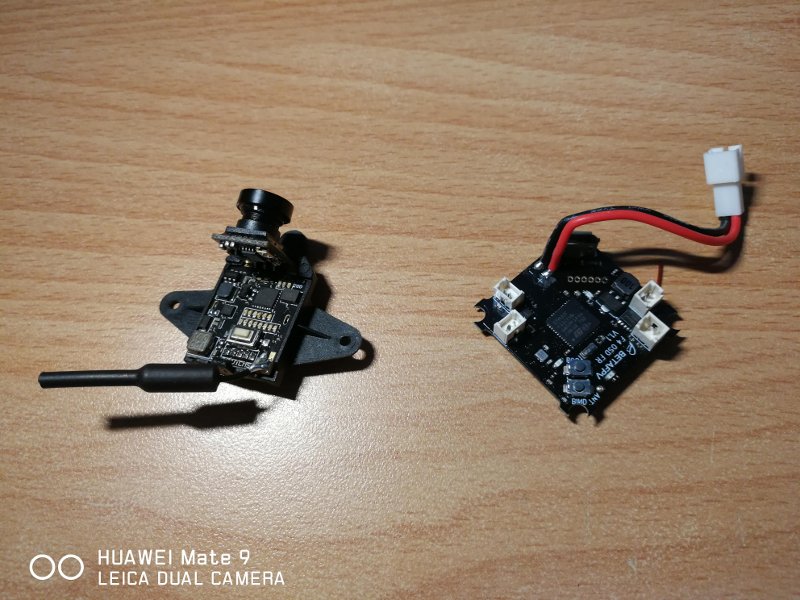
[ FCの特徴 ]
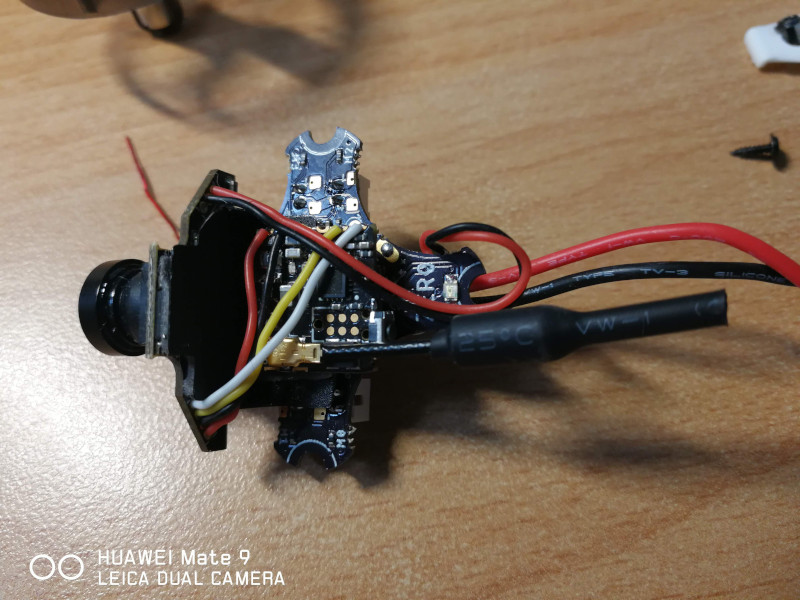
[ Camera + VTXの特徴 ]
最近、OpenTXユーザーとなったわたしにとってはTinyながらTelemetryが使えることにOSDよりも興奮します。正確なRSSIが得られますし、バッテリーの電圧値を送信機に喋らせることが出来ます。Smart AudioもあるのでVTXの設定もLua Scriptで済ませられると考えるだけでわくわくします。
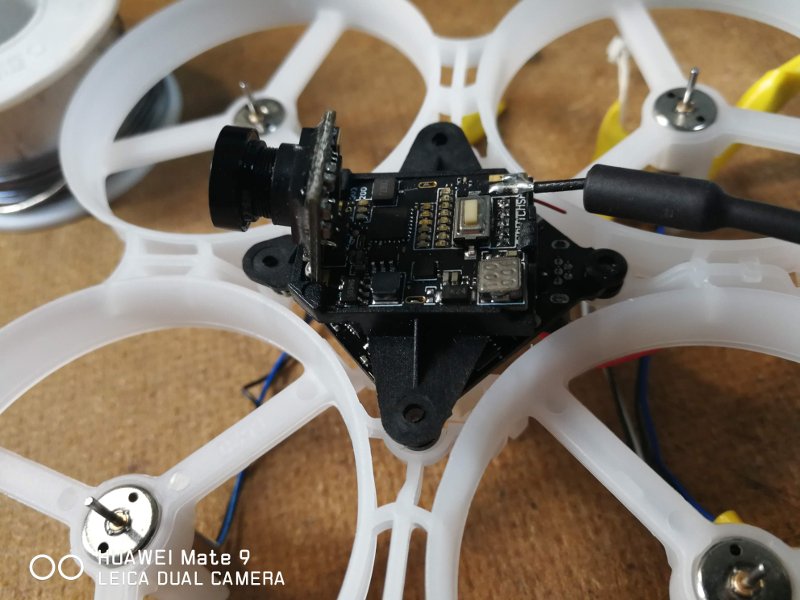
FCとCamera+VTXをコネクターで接続すると、あとはフレームに載せてモーターを接続するだけで飛びます。リード線を引き回すなんてことが必要ないスマートな構成です。
[ 設定 ] PROJECT MOCKINGBIRD v1.1b 準拠にしました。フィルターその他は変更していません。
[ バインド ]
[ 飛びっぷり ]
不具合というか、おそらくはハズレFCを引いてしまったのだと思いますが、連続して飛行していると時々FCが暴走します。暴走すると、テレメトリーが失われたと送信機が話し、コントロールを失い、モーターが回りっぱなしになります。このため、ちょっと屋外飛行を躊躇しています。
手持ちの中で一番飛ばしやすい室内用ドローンであるInductrix FPV、長らく不調でしたがモーターを交換して復活しました。Angle mode限定ですが(というか、もうこの機体はAngle Modeだけで飛ばそうと思っています)、FPVで室内を自由自在に飛び回れるのが楽しい機体です。Tiny7も室内で飛ばしますが、今ひとつフィーリングが合いません。
そこで室内で、かつAngle Modeで試すことの出来るトリックであるNose In Yaw Spins(Orbitとかノーズインサークルとも呼ばれます)を練習することにしました。これは対象となる物をFPVカメラで捉え続けながら周りを旋回するテクニックです。通常の旋回とは違い横方向に移動しながら旋回するものです。
どうすれば実現できるかを説明するのは難しいですが、私が試した過程を簡単に書きます。
頭の中でスティック操作を考えてみる。左旋回を想定。FPVゴーグルを装着しての飛行です。
離れた場所から対象の右側にまっすぐ前進(エレベーターを前に倒している)
旋回軌道に入る手前くらいまで対象に近づいたら対象物が常にカメラ中央で捉えられようにラダーを左に倒し始める、エレベーターは調整しつつも少し前に倒したまま。
少し遅れてエルロンを右に少し倒すことにより旋回動作を始める。
カメラの画像を頼りに対象物との距離を一定に保つように各舵を調整しつつ旋回動作を続ける。
その通り実践。最初はエルロン操作がやや難しくて旋回に入らなかったりしましたが、エルロンを切り始めるタイミングを見失わなければ大丈夫です。数回の練習であっさりと出来るようになりました。
Angel modeだと割と簡単な気がします。Acro Modeではさらに複雑になると思います。想像では積極的なエレベーター操作が必要と思いますが、まだ実践できていません。
以下、スティック操作の様子も映しこんだ動画を添付しておきます。
VIDEO
– スティック操作は微妙すぎて良く分からないかもしれません。
FPVドローンの飛行をパソコン上で練習することが出来るシュミレーターアプリケーションを2つ紹介します。
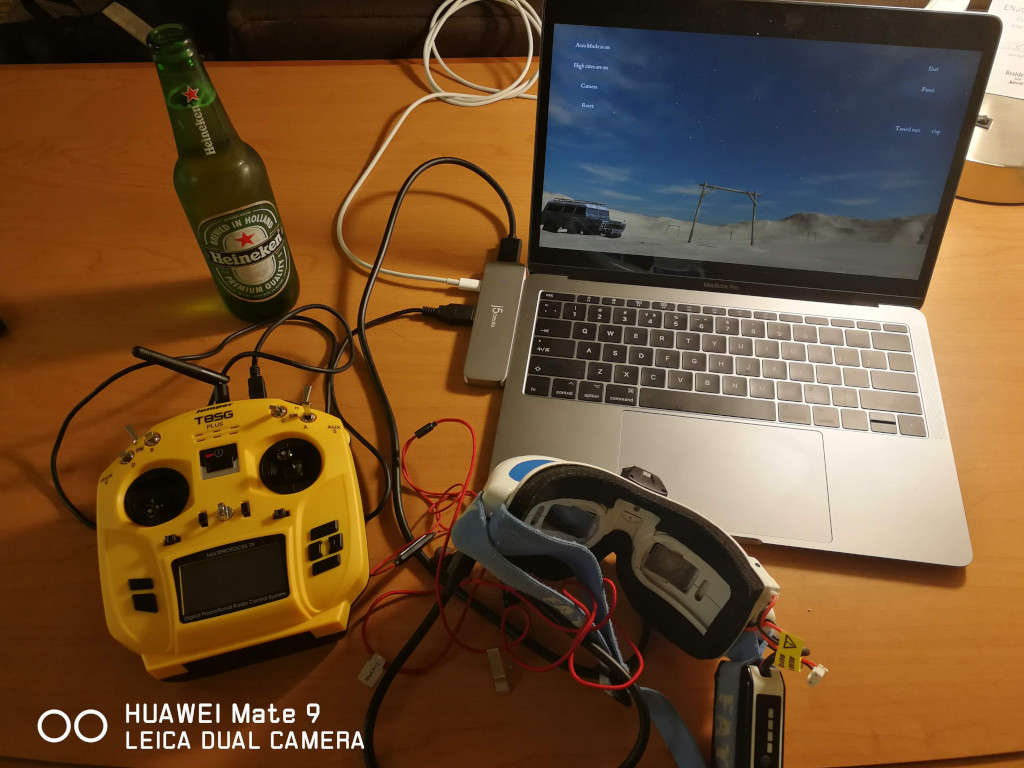
[ ハードウェア環境 ] )とMacBook Pro(i7, Touch Bar無し2017)の両方を使用しています。今回は私の出張先での練習環境であるMacBook Proについて主に書いて行きます。
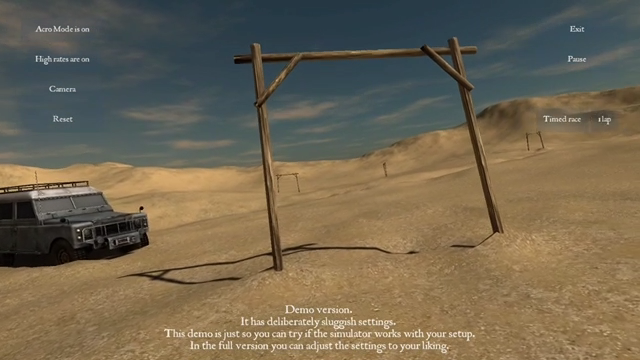
[ FPV Freeride ]
ゴーグルを接続してVGA画面になっている状態です
とりあえずシュミレーターを試してみたい場合、FPV FreeriderのDemo版であれば無料で試すことが出来るのでお勧めです。Demoではひとつのシーンしか使用できないだけで機能的には同じと思います。有料版の価格も4.99ドルと格安です。細かい設定などなく簡単に使用できます。
やや機体のレスポンスなどが緩めに設定されている気がします。そのため本物より飛ばしやすい気がします。逆に言うと初心者は、このアプリケーションから始めるのが取り組みやすいかも知れません。
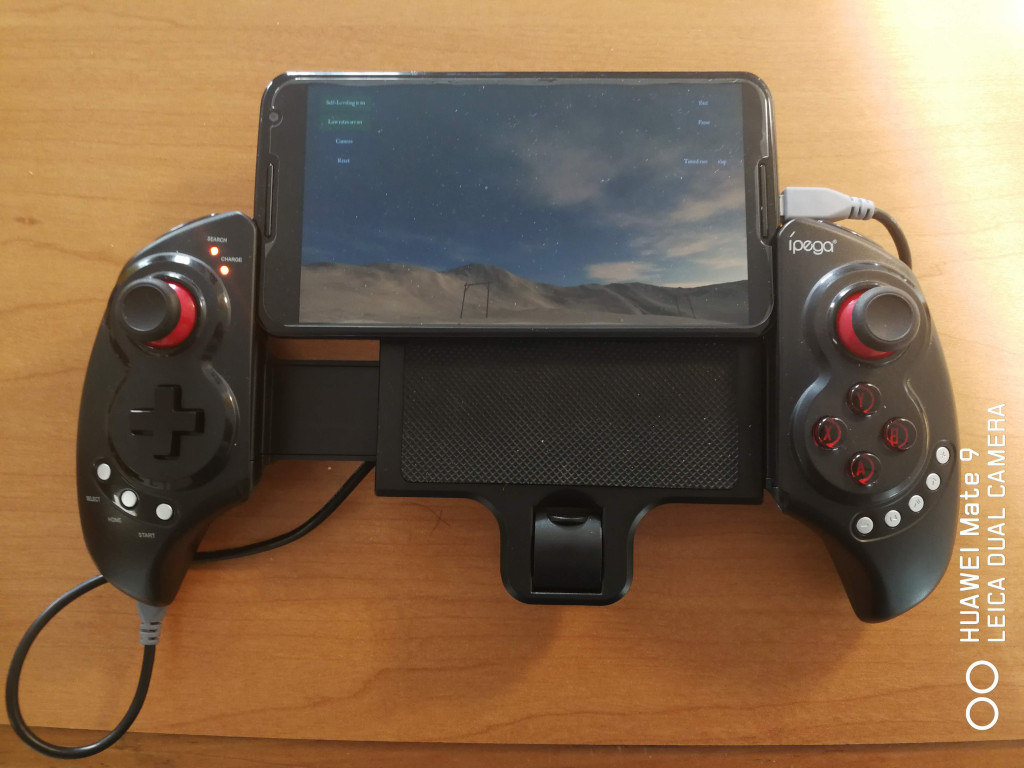
Freeriderにはアンドロイド版もあるので携帯電話で楽しむことも出来ますが、本格的な練習の場合はパソコンの方が良いでしょう。
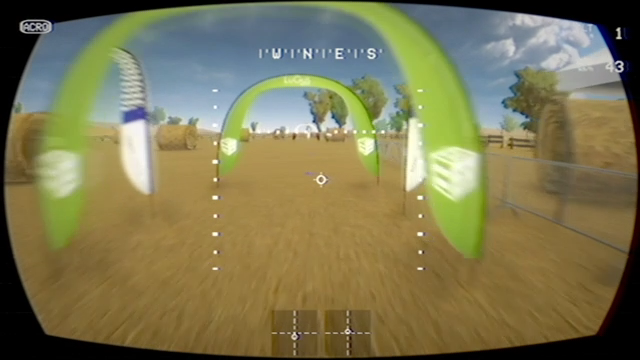
[ Liftoff ]
ゴーグルを接続しているのでVGA画面になっている。パソコン上では解像度は自由に選択できる。
Steam Liftoffはとても良くできたFPVシュミレーターです。機体の設定も実機と同じようにPIDやRateが変更出来ます。OSD画面もありますし、ゴーグルのノイズとか遠くに行った時に画像が乱れてくる様子とか、とにかく芸が細かいです。そのかわり動作が重くなるので、画面の解像度を下げたり画像エフェクトを減らしたりしないとMacBook Proでは快適に動きません。
舵がかなりシビアですので最初は思うように飛びません。少し操縦しやすくするためにコントローラーの設定でスティックのセンター付近の動きを無視するDeadbandを各舵に0.03ほど設定したり機体のフライトコントローラーの設定でレートを少し下げた状態から始めるのが良いでしょう。
[ Acro Modeでの練習方法 ]
– 実機もシュミレーターも同じで、まずはスロットルの感覚を掴むところから始めます。一定の高度を保つように努力します。Freeriderだと景色が頼りなので(実機でゴーグルを装着した場合も同じですが)、高度が上がりすぎると見極められませんので低い高度で安定することが重要です。
シュミレーターと実機の練習を交互に行うと効果的な気がします。
[ 関連記事 ] FPVシュミレーターのススメ設定編 -1- Freerider Windows用モデルの作成 (2019/01/25)FPVシュミレーターのススメ設定編 -2- Deviationのファームアップデート (2019/01/29)FPVシュミレーターのススメ設定編 -3- 送信機の無線接続 (2019/01/31)