だいぶ前に書きかけていて放置していた記事ですが、T8SG PLUSが技適マーク付きになったとのことで掘り起こしてきました。
わたしはDeviation化したWalkera Devo10と最初からDeviationで動いているJumper T8SG PLUS を使用しています。最初はDevo10用に作られたTemplateをT8SGに流用していました。スティックをいくつかReverseするだけで使用できていましたが、時折りおかしな状態になります。FCに接続できていますがスロットルだけ動かなくなります。送信機のモニターでは動作しているのですがBetaflight Configuratorの受信機タブではスロットルが動かないという不思議な現象です。
解決策は単純でT8SGでスクラッチからモデルを作ることです。慣れてくればさほど時間はかかりません。唯一ややこしいのは3点スイッチの動作です。覚書的にこの設定方法だけを書いておきます。
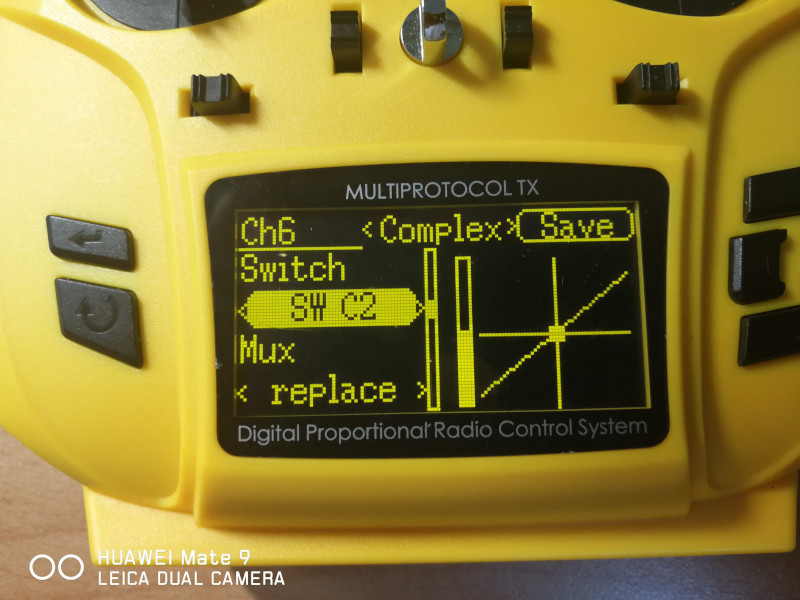
T8SGのSW CをCH6に割り当てる例です。
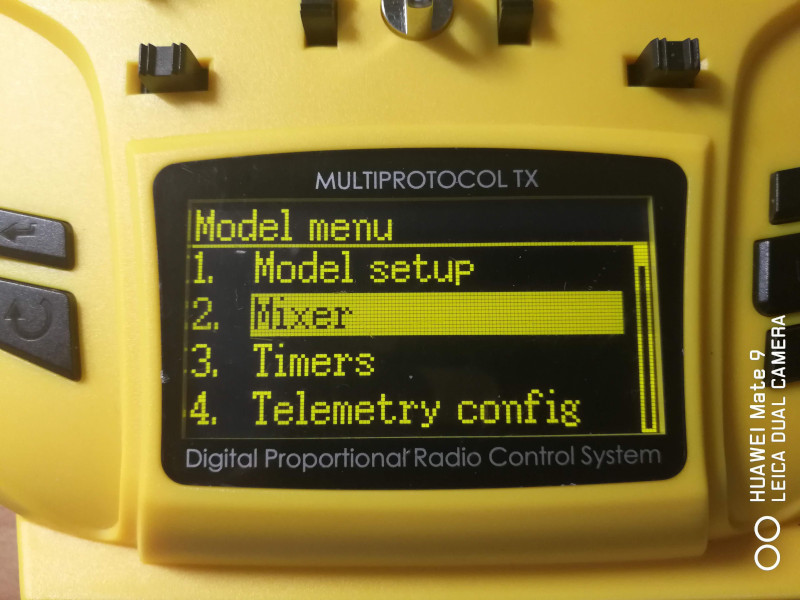
– Model menu/Mixerを開きます。
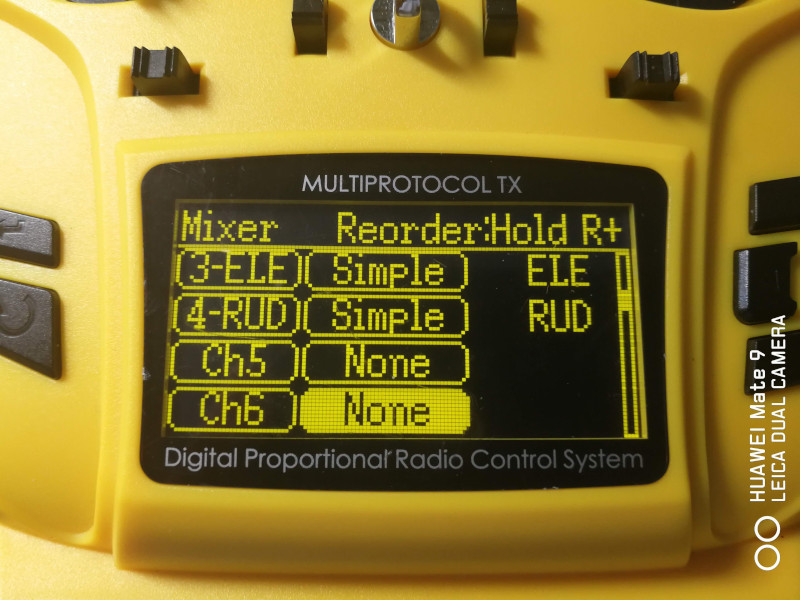
– Ch6の横にNoneと表示されているのでNoneのところを選択してEnterします。
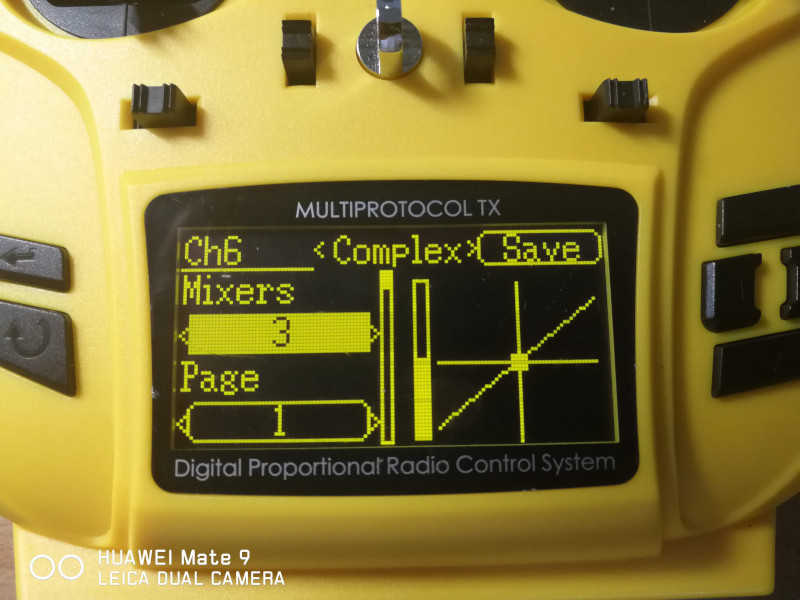
– NoneのところをComplexに変更します。
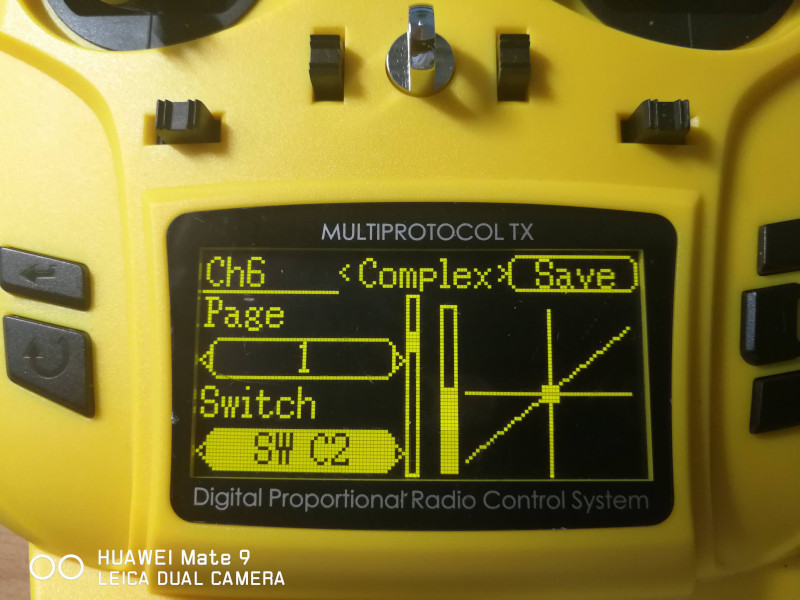
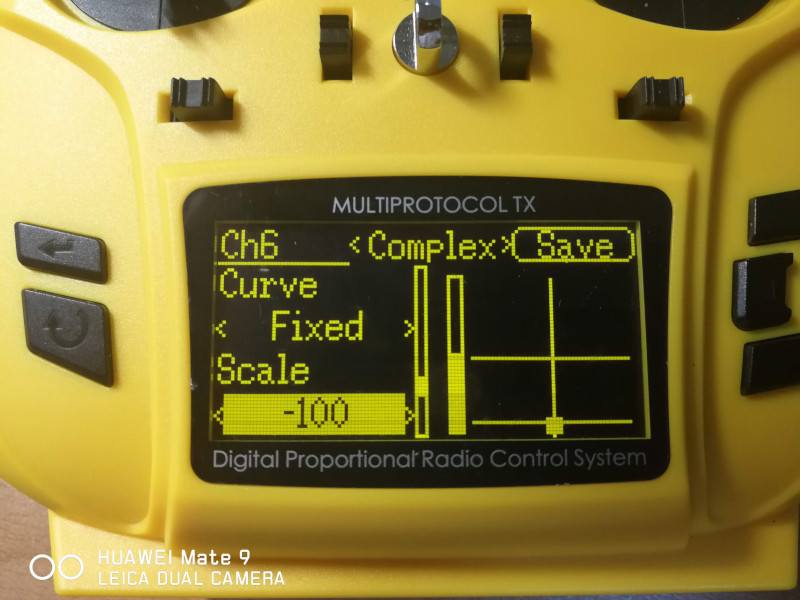
– Page 1/Switch: SW C2 (Switchを選び実際のスイッチを該当のポジションにすれば自動的に入ります)/Mux: replace/Src: None/Curve: Fixed/Scale: -100
– Page 2/Switch: SW C1/Mux: replace/Src: None/Curve: Fixed/Scale: 0
動作の確認はTransmitter menu/Channel monitorで行えます。
以下、モデルファイルから該当部分を抜き出したものです。[channel6]
技適マークがあるかどうかは販売元にお問い合わせください。
覚え書きです。日本では技適な問題があって使えないTipsかもです。
私がFrSkyの受信機のファームウェアを書き換える目的は二つです。XMもしくはXM+をRSSIを取れるようにするためとR-XSRをFPORT仕様にするためです。
更新にはFrskyの送信機Taransi QX7Sを使用しました。
[ ファームウェアの準備 ] ダウンロードページ にあります。
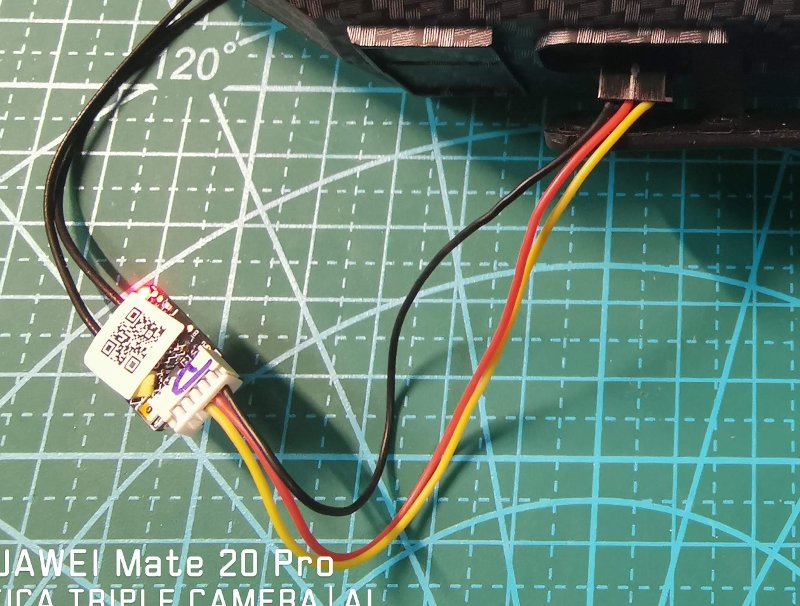
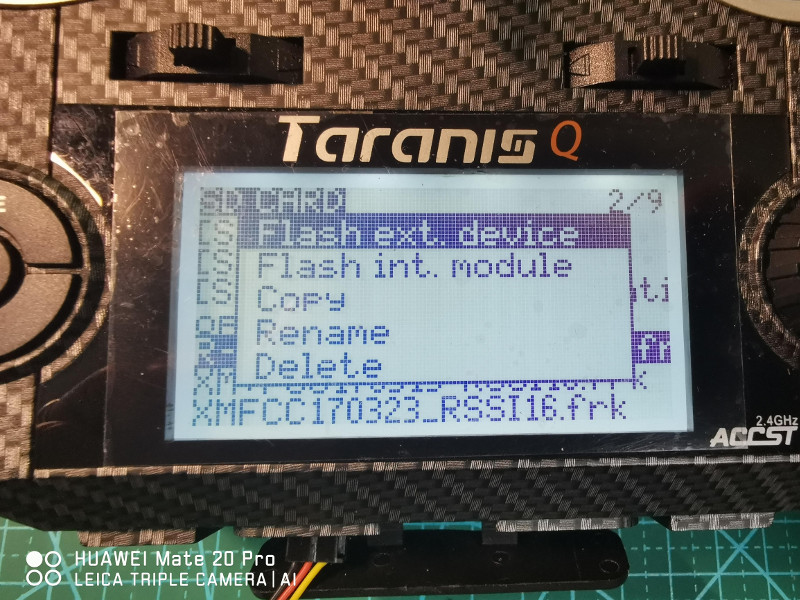
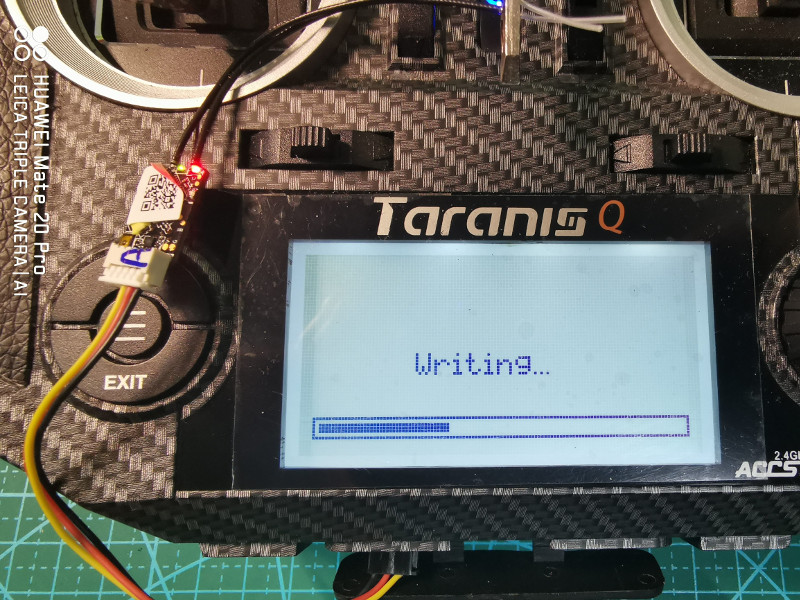
[ 受信機の接続 ]
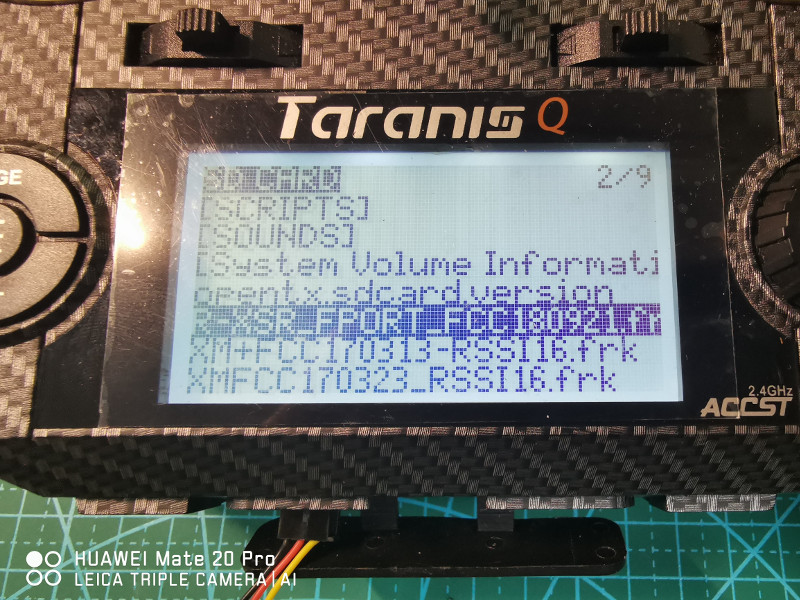
[ ファームウェアの更新手順 ]
– 右のダイアルを回して目的のファームウェアファイルを選択します
– 右のダイアルを長押し、メニューからFlash ext. deviceFlash S.Portを選択するとファームウェアの更新が始まります
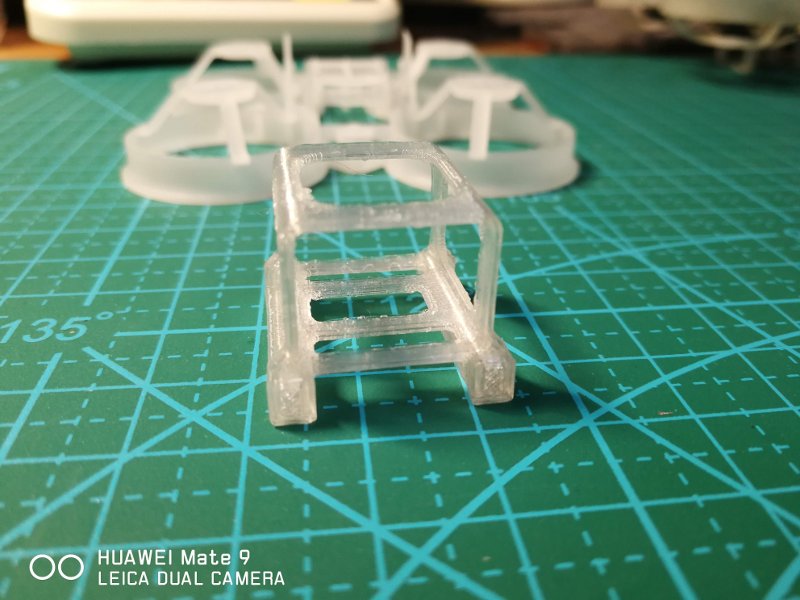
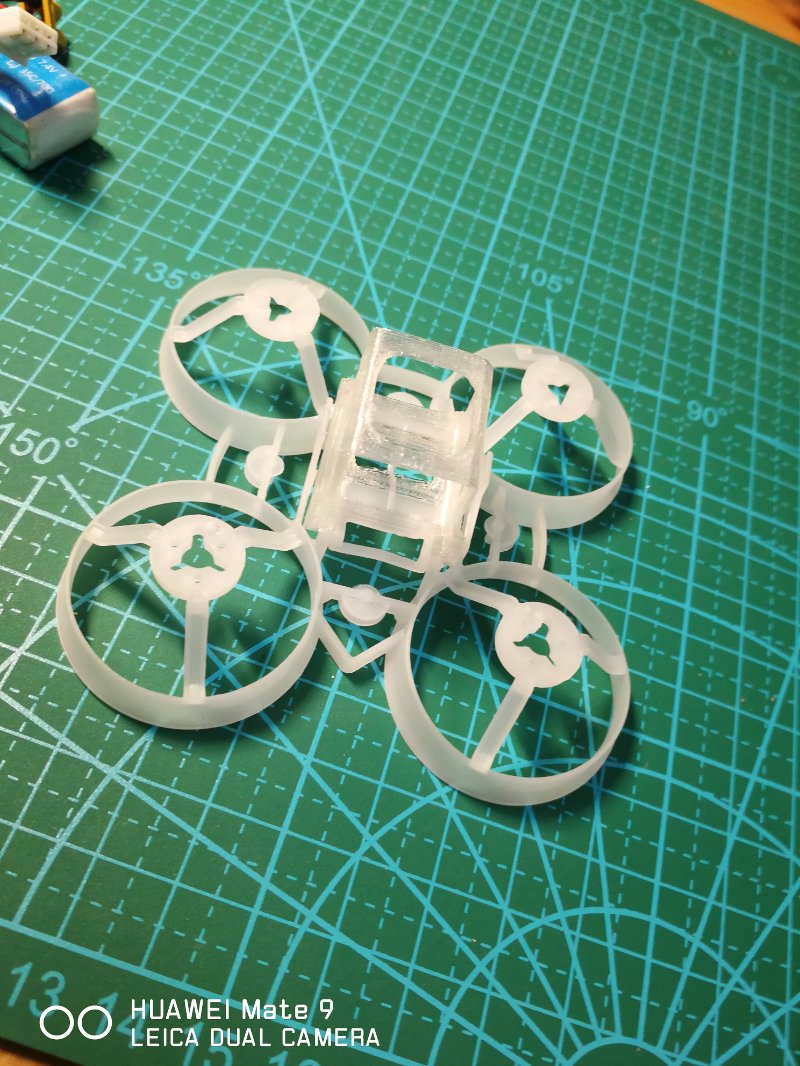
Beta75XのFC/ESC/Motorを載せるためのフレームを3Dプリンターで出力すべく設計してみました。
目的は、3Dプリンターで出力したフレームで実際に飛行が可能であることの検証とBeta75XのYaw Washout問題がダクトの無い機体では発生しないことの確認です。
VIDEO
目的は概ね達成しました。ちゃんと飛びましたしYaw Washoutらしき挙動もまったくありません。ただし、FC/ESCが不調になったため検証のための飛行時間がだいぶ短いです。あと、細かな振動が発生して画像が揺れています。これも解決したかったのですが、FC/ESCの不調によりかないませんでした。
せっかくデザインしたフレームなのでThingiverse にて公開しました。
一般的には送信機をUSBでパソコンに接続してシュミレーターを動かします。それでも問題はありませんが、ケーブル無しで操縦できる方が取り扱いが楽なのは間違いありません。
USBドングルの形になった専用品も販売されていますが(下のアマゾンリンク参照)、手元にある使っていないFCと受信機でもシュミレーターに接続することが出来ます。手順は簡単ですが、いくつかヒントを書いておきます。
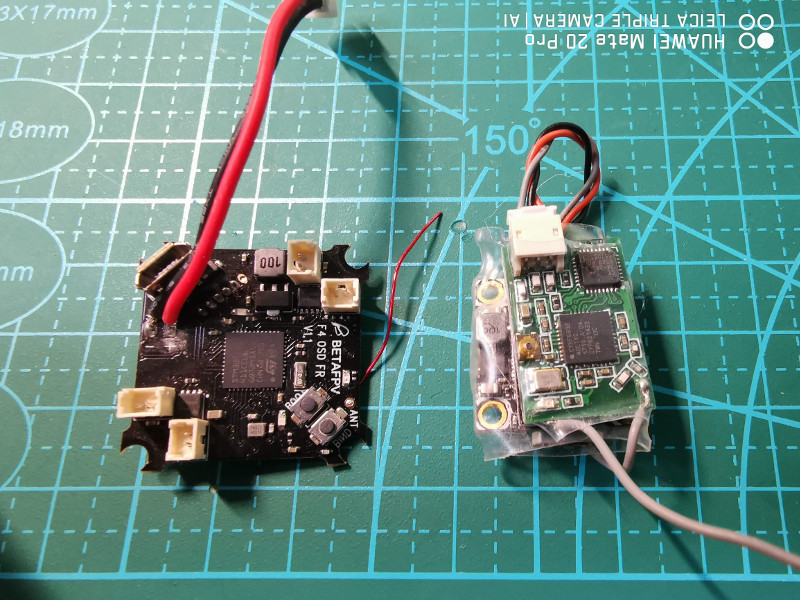
[ F4が必要 ]
[ 受信機がUSB給電で稼働すると便利 ]
左は受信機がSPI接続でオンボード搭載。右は3.3Vで動くDSMX受信機をFCに接続したもの。
[ 設定 ]
set usb_hid_cdc = on
save
を投入するだけです。
このために専用のFCを用意することなく実際に飛行するドローンをこの目的で使用することも当然できます。LiPo電池を接続する場合はVTXのオーバーヒートに注意してください。
[ 関連記事 ] FPVシュミレーターのススメ (2018/07/22)FPVシュミレーターのススメ設定編 -1- Freerider Windows用モデルの作成 (2019/01/25)FPVシュミレーターのススメ設定編 -2- Deviationのファームアップデート (2019/01/29)
FPVシュミレーターで主に使用するT8SG Plusで少し問題がありました。Windowsでは出荷された状態で使えるのですがMacBookにつなぐとスティックに反応はするもののマウスポインターが暴れ回って使い物になりません。これはDeviationそのものに問題があり、新しいバージョンでは解決しているらしいことが分かりました。
ファームウェアの更新は難しくはありません。問題はどのファームウェアを導入したら良いかということです。というのもDeviationの正式リリース版は5.0.0しかなく、これは何年も前のものです。新しい機能や修正されたもの、また新しい機種用のファームウェアはNightly Builds というところから適当にダウンロードしなければなりません。Nightly Buildsというのは日々更新されるファームウェアが置いてある場所で、本当に正しく機能するかどうかは試してみないことには分かりません。
今回、手順を検証するにあたり2019-01-29版のT8SG V2 Plus用ファームウェアを導入してみましたが、構成画面でEXITキーが効かない問題がありました。仕方なく、もともと使用していた2018-07-10版に戻しました。時々Deviation Forumに動くバージョンが張り付けてあったりもしますが、なかなか正しいバージョンを見つけるのに苦労しますので、なるべくならアップデートしたくないものです。
そんなわけでリスクはありますが、簡単にアップデートの手順を書いておきます。正式な方法は各機種のDeviationマニュアルに書かれています。
今回はDeviation Uploader 0.9.0 というJavaで書かれたツールを使用しました。MacOSで試しましたがWindowsでも動くはずです。DFUモードのドライバーの導入が別途必要となりますがFPVドローンをやっている方はすでに導入されているものと思います。
1. DedviationUpload-0.9.0.jarを起動する(Java Runtimeが必要となります)。
以上でファームウェアの更新は完了です。
[ 関連記事 ] FPVシュミレーターのススメ (2018/07/22)FPVシュミレーターのススメ設定編 -1- Freerider Windows用モデルの作成 (2019/01/25)FPVシュミレーターのススメ設定編 -3- 送信機の無線接続 (2019/01/31)
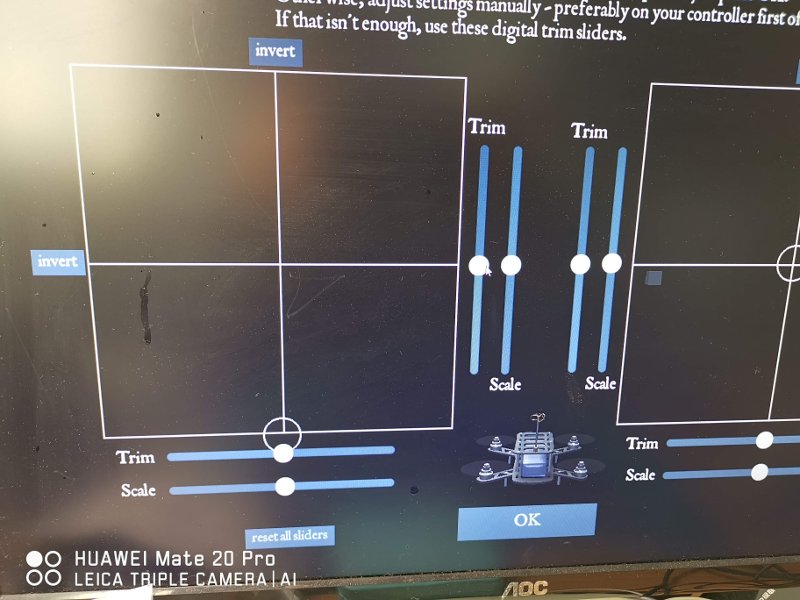
なかなか練習出来ない5インチ機をうまくなるべくシュミレーターに取り組んでいます。使用しているのはFreeriderとLiftoffでMacBookとWindowsデスクトップの両方で稼働しています。ちゃんとした練習のためには本物の送信機(プロポ)を使用することが必須です。送信機とパソコンの接続は難しくはないのですが、Windows版のFreeriderだけが接続は出来てもうまくコントロール出来ません。それを解決する方法について覚え書き的に書いておきます。
ネットを探すとOpenTX用の設定ガイドはすぐに見つかります。またDeviationの入ったDEVO用の出来合いのモデル・ファイルもあります。私がシュミレーターで主に使うT8SG PLUSではDEVO用のモデルを入れると微妙な状況になりますし、簡単ですので自分で作成するのが無難です。
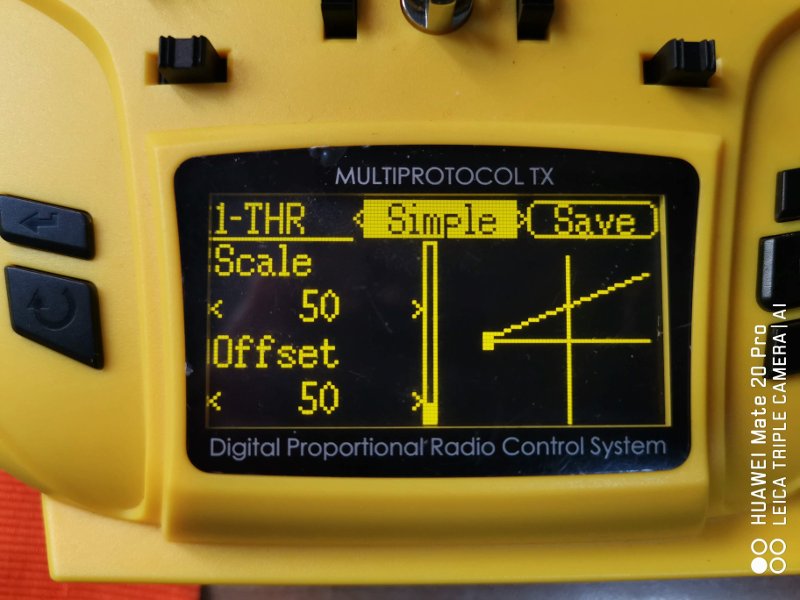
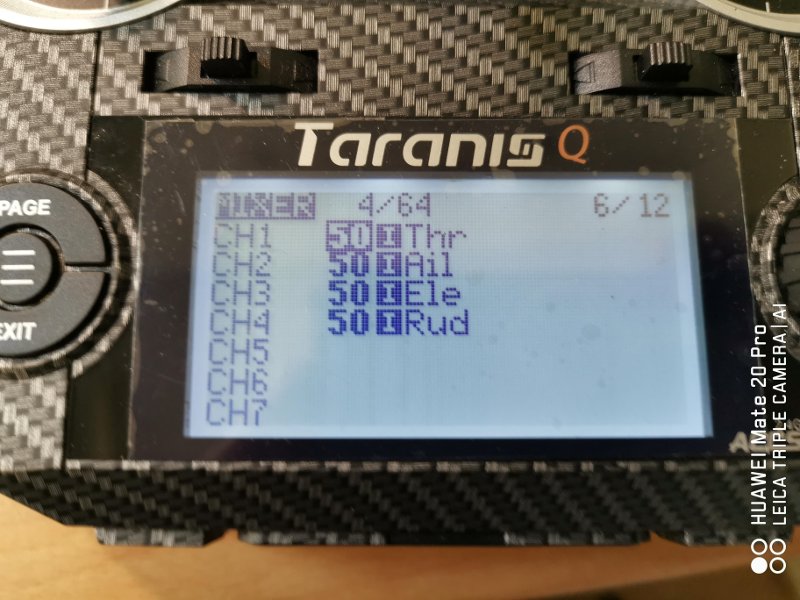
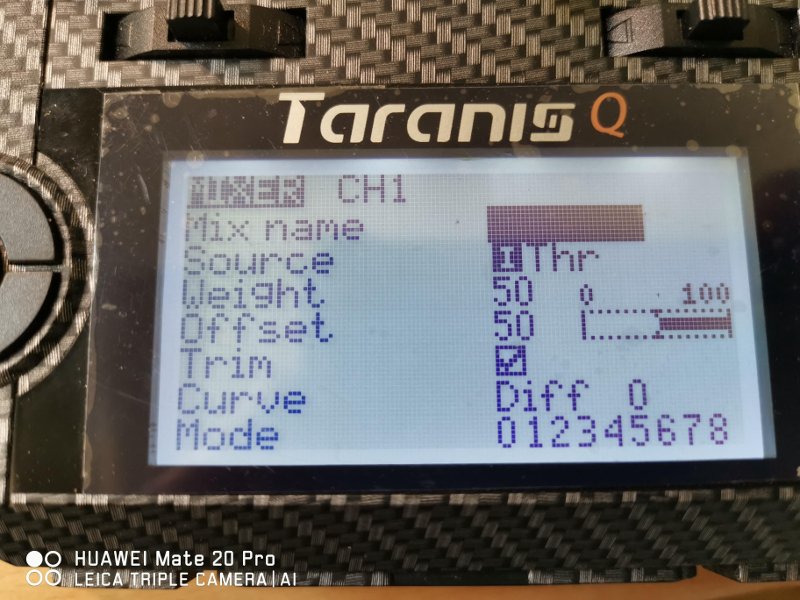
行うべきことは単純です。OpenTXもDeviationも規定値ではスティックの振れ幅は-100から100になっています。これを全てのスティックについて0から100に変更するだけです。
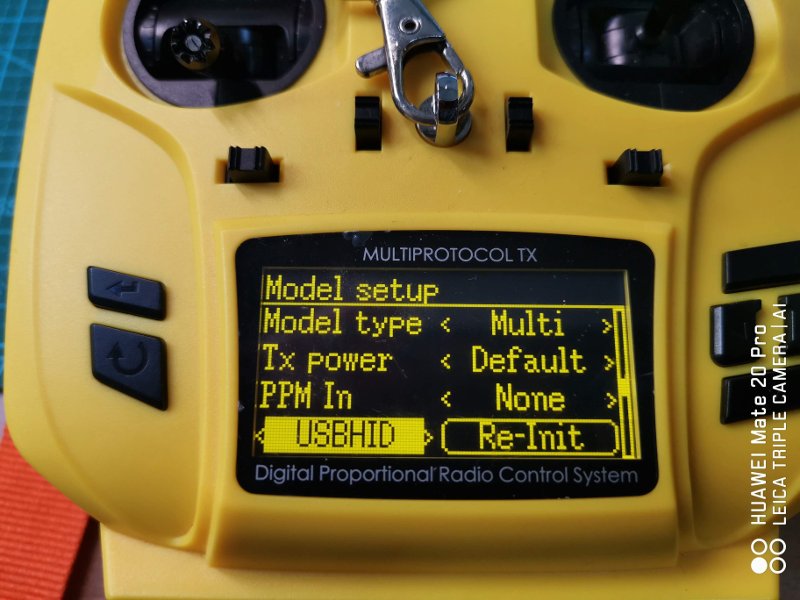
[ Deviation – T8SG PLUS ]
USB接続の場合は、Model SetupのプロトコルをUSBHIDにしておきます。
と書きましたが私のT8SG Plusではファームウェアの更新を行わないとUSB接続(HID)によるシュミレーターの操作は出来ませんでした。これについては改めて手順を書きます。
[ OpenTX – QX7S ]
[ Windows版Freerider ]
[ 互換性 ]
[ 関連記事 ] FPVシュミレーターのススメ (2018/07/22)Deviationのファームアップデート (2019/01/29)FPVシュミレーターのススメ設定編 -3- 送信機の無線接続 (2019/01/31)
VIDEO
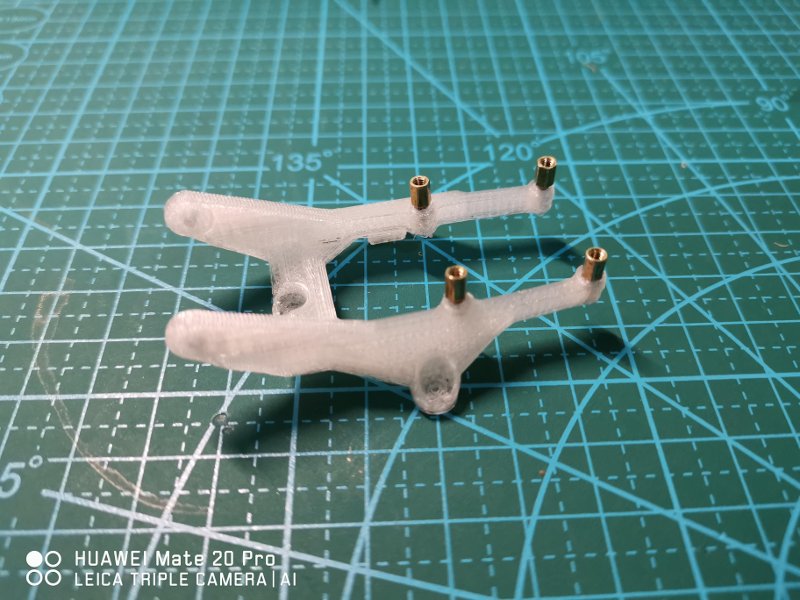
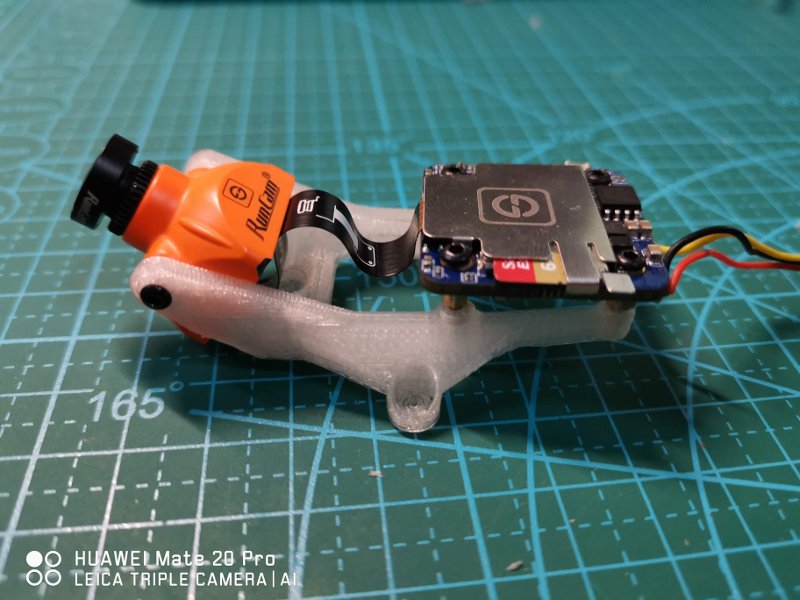
私が使用している1080P 60FPSで録画出来るRuncam split mini2のBeta75X用のカメラマウントは上海でのFPVフライトの師匠である水田さんの設計によるものですが、その3Dプリンター出力用ファイルを水田さんのご厚意により公開することになりました。リンクは下に貼ってあります。
My Beta75X has HD camera recorder Runcam split mini2 with 3D printed mount. This mount was designed by my FPV flight guru Mr. Mizuta. He kindly allows me to attach STL file here. Please refer link below.
Runcam Beta75x_mount_v6.4-Small.stlの商用利用はご遠慮ください。
Please do not use “Runcam Beta75x_mount_v6.4-Small.stl” for commercial purpose.
Runcam Beta75x_mount_v6.4-Small.stl
Use metal studs come with Runcam split mini2.
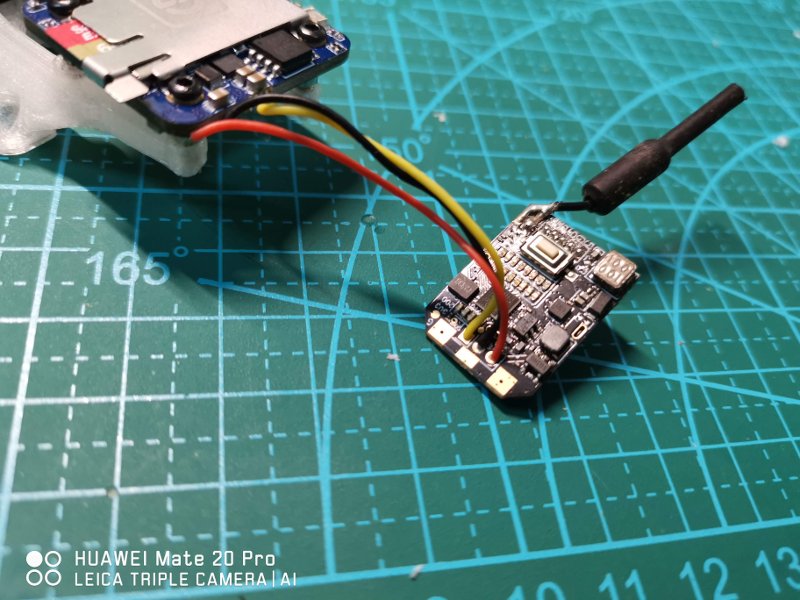
Wiring sample for original Beta75X VTX.
Fatshark Dominator V3の受信機を感度の良さそうなFurious True-D V3に交換しました。その後、時々Fatsharkの画面が消えたりDVRが動かない現象が発生。最初はてっきりFatsharkの故障かと思いましたが、考えてみるとTrue-Dを入れてから問題が発生していました。そこで情報を探してみると海外の掲示板で同じ現象と対策が見つかりました。以下のリンクがその情報です。このスレッド自体は他のTrue-D自体の問題について多くの書き込みがあります。私のTrue-Dは、その問題については既に対策が施されていました。
https://www.rcgroups.com/forums/showthread.php?2839452-Furious-True-D-V3-Diversity-Receiver-System-Kills-Fat-Shark-HD-Dominators/page5
https://www.rcgroups.com/forums/showpost.php?p=37251788&postcount=221
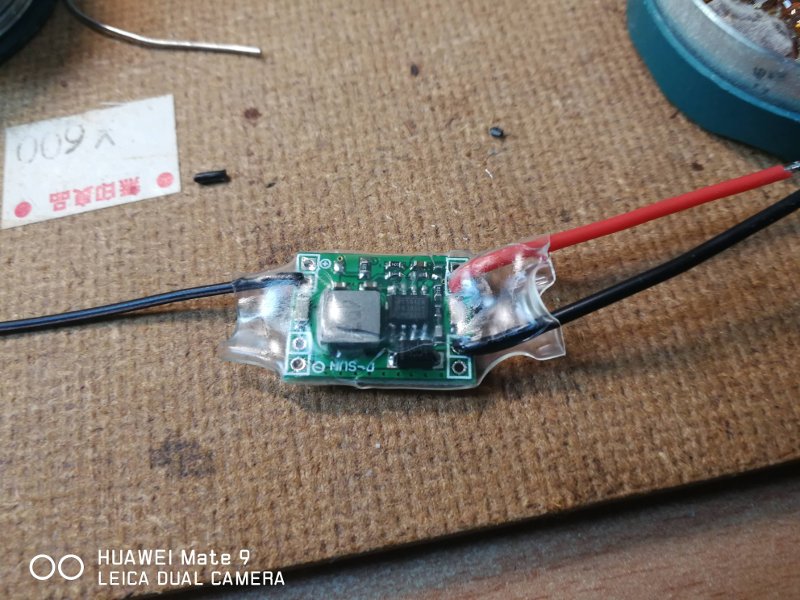
問題はTrue-Dが電力を食い過ぎているということで、対策は独立した5Vのレギュレーターを組み込んでTrue-Dに直接給電するというものです。
用意したのはD-SUMと書かれた5V 3Aを供給出来るDC-DCコンバーターです。入力は7V-28Vです。念のため出力波形を簡単なスコープ で見てみました。ノイズもなく綺麗な波形なのでコンデンサーとか付けなくても大丈夫そうです。
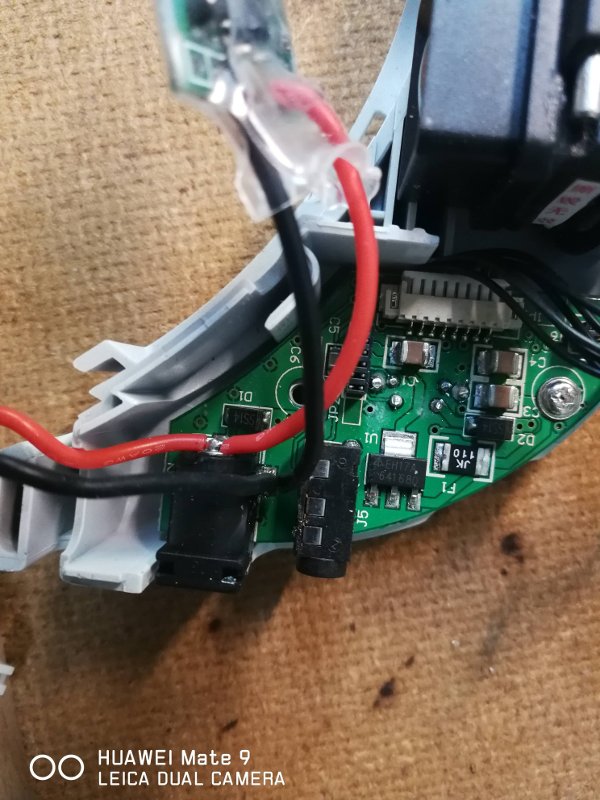
Fastsharkを分解してバッテリーのコネクターから入力電圧を取ります。ファンMod を行っているので電源コネクターからは二組のリード線が出ている。
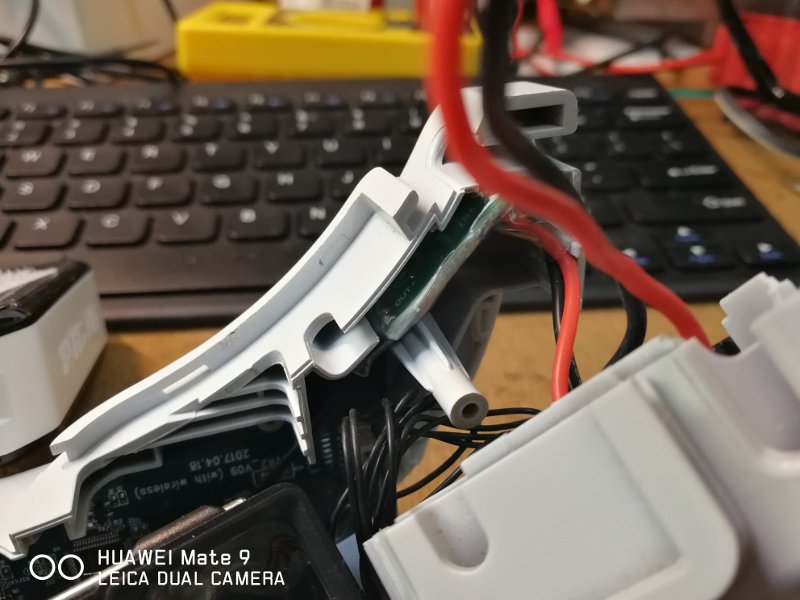
筐体の上の方に隙間があるので、そこにレギュレーターをおさめます。
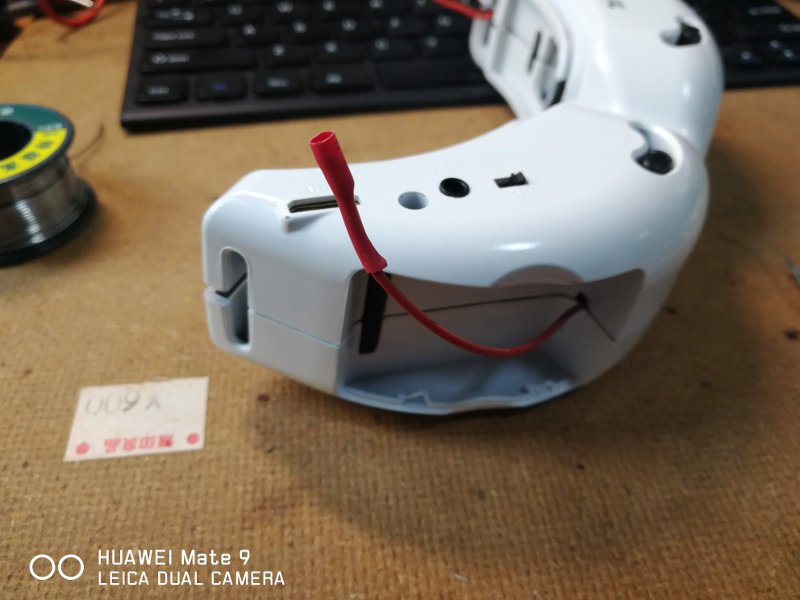
+5Vの出力をFastsharkの中を通して受信機ベイまで引っ張ります。GNDは入力側で接続されているので引っ張らなくても大丈夫です。
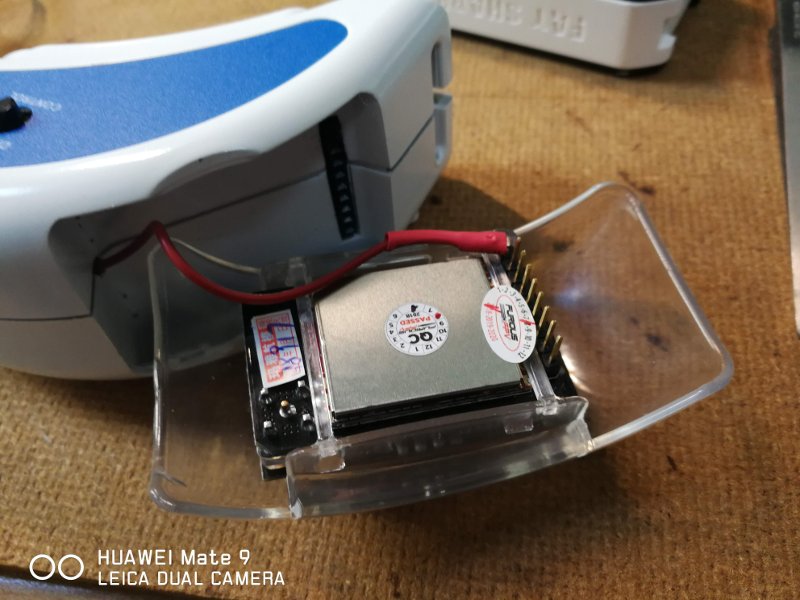
True-Dの一番下のピンを曲げて、そこに+5Vの線を接続します。コネクターを分解して得たピンで接続しています。
ピンを曲げているので、他のピンがちゃんと入るかどうか心配でしたが問題なく収まったようです。
綺麗に元に戻せば完成です。しばらく室内飛行でテストしましたが問題なく動きます。屋外飛行に持ち出しても大丈夫そうです。
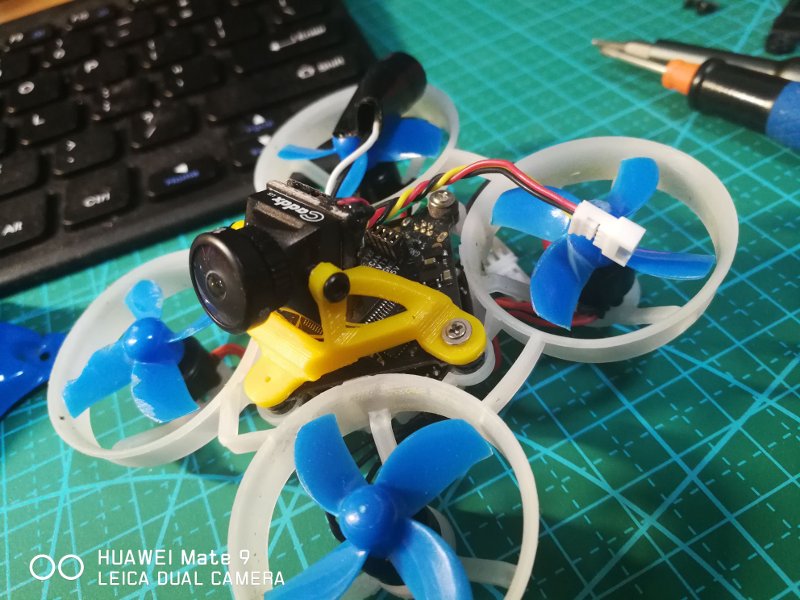
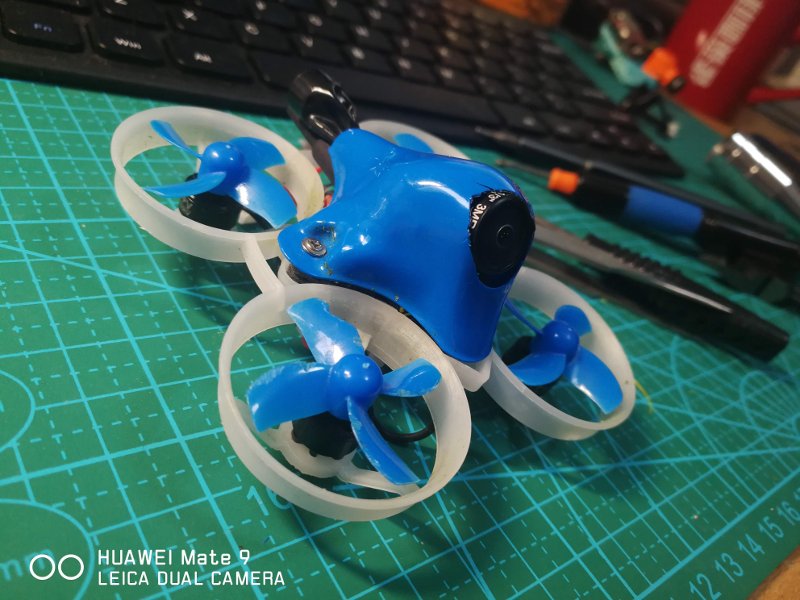
BetaFPV Beta65XのカメラをCaddx Turbo EOS1(1200VTL)に換装しました。
EOS1とEOS2の違いが今ひとつ分かりません。マウントのためのネジ穴があるのがEOS2だという説がありますが、わたしのはEOS1と書かれていますがネジ穴がありました。
カメラマウントは以下のサイトからもらったデータを使用して3Dプリンターで出力しました。
https://www.thingiverse.com/thing:3113231
キャノピーは元々付いていたもののカメラ穴を広げ、またカメラマウントの足部分も当たるので少し切り取りなんとか付けました。
オリジナルのカメラでも十分に飛ばせますが、より解像度が上がり、暗い部分も良く見えているので、いざという時に役に立つはずです。
VIDEO
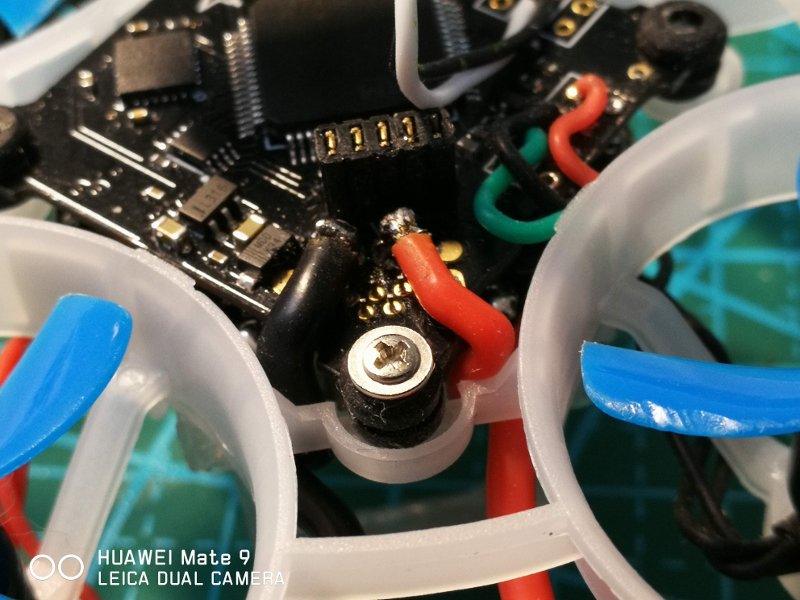
やや燃費が悪い(75Xと同じ容量の電池を使っても飛行時間がだいぶ短い)ながら家の中でも外でも軽快に飛ばせるBeta65Xですが、最近不調になり飛ばし始めてすぐにバッテリー電圧低下の警告が出るようになりました。原因の目星はだいたい付いていてESCポードとFCボードの間でうまく電圧が伝わっていないと想像出来ました。
対策として半田付けでジャンパーケーブルを組み込むことにしました。
ついでなのでXT30コネクターへの変更も行いました。
一体化した2Sバッテリーを使用するためにフレームに3Dプリントしたバッテリーホルダー の取り付けを行います。
バッテリーホルダーを設計した人は、バッテリーホルダーに切り込みを入れてフレームにはめ込むように考えていますが、3Dプリントで使用した材料がPLAという固いものなので、この方法は使用せず。フレーム側を大胆に切り取りはめ込んで接着しました。
なんだかXT30コネクターが筐体の大きさに対して不釣り合いな気もします。またもとのPH2.0コネクターに戻すかも知れません。