前の記事とは時間が前後しますがV919 Air Dual Boot V5のWindowsクリーンにするためメーカーが用意しているWindows 8.1のイメージでリストアしてみました。メーカーの準備した手順書通りで問題なく導入出来ますが中国語の説明書でしたので、簡単に手順の解説をしておきたいと思います。
I needed to clean Windows environment of my V919 Air Dual Boot V5. The procedure provided by Onda was okay. However it was written in Chinese. So, I summarized the procedure here.
[ イメージファイルのダウンロード ] Download image files
わたしは実際には中国のサイトからダウンロードしましたが、おそらく以下の英語ページのファイルも同じと思います。
I actually downloaded image files from Chinese web site, but it seems to me following English web page provides same image files.
- V919 3G AIR _winows 8.1 system image (V5 version) .part1.rar
- V919 3G AIR _winows 8.1 system image (V5 version) .part2.rar
とりあえずpart1の中からUltraISO_v9.5.2.2836.exeとWin8.1_x32_PE.isoを取り出します。rarの展開には7-zipを使いました。Extracted ‘UltraISO_v9.5.2.2836.exe’ and ‘Win8.1_x32_PE.iso’ from part1 file. I used 7-zip to extract rar files.
[ USBメモリーにブートイメージを作成 ] Create bootable USB memory stick
- 8GB以上のUSBメモリーをPCに挿入します。Insert USB memory (8GB or larger) to the PC.
- UltraISO_v9.5.2.2836.exeを管理者権限で実行します。Run ‘UltraISO_v9.5.2.2836.exe’ as administrator mode.
- Win8.1_x32_PE.isoを開きます。Open ‘Win8.1_x32_PE.iso’ by Crtl+O dialog.
- Alt+Bで開く上から4番目のメニューを実行します。Invoke 4th submenu of Alt+B menu tree.
- ダイアログの中央付近でUSBメモリーのドライブを選択します。Select USB memory drive at middle of the dialog window.
- 左側のチェックボックスにチェックマークを入れます。Check left side check-box on the dialog.
- 左から2つ目のボタンを押します。Press 2nd button from left.
- UltraISO_v9.5.2.2836を終了します。Close the UltraISO_v9.5.2.2836.
- Windowsのディスクの管理を開き、USBメモリー上の大きい方のパティションをNTFSでフォーマットします。この時、ラベルをWINPEとします。Open disk manager of the Windows and format larger petition of the USB memory stick as NTFS format. Alter label to ‘WINPE’.
- ダウンロードした2つのファイルの内容をこのNTFSパティションに展開します。ただしpart2の方のimages/Install.wimは壊れているようです。同じファイルがpart1に入っているようなので問題はないでしょう。Extract contents of 2 downloaded files to this NTFS partition. But ‘images/Install.wim’ of part2 file is corrupted. Same file is in part1 file, so it should not be a problem.
[ リストア ] Restore
- OTGケープルにUSBハブを接続しキーボード、マウス、作成したUSBメモリーを刺します。Connect USB keyboard, mouse and USB memory which created the WINPE image above by using OTG cable and USB hub.
- V919の電源ボタンを押します。ホームボタンが青く光ったらキーボードのEscキーを押し続けます。Power on V919. When home button is lit, press and hold Esc key of the USB keyboard.
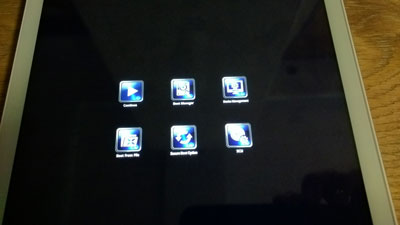 こんな画面が出ます。You will see the screen like this.
- キーボードを使い2つめのBoot Managerを選択します。Invoke 2nd icon, Boot Manager by using keyboard (no touch panel capability on this screen 🙂
- サブメニューでUSB memoryからのブートを選択します。Invoke USB memory boot.
- しばらく待つとWindows 8.1の設定画面が現れます。You just need to wait for Windows 8.1 setup screen after that.
no comment untill now